Pages

Showing posts with label Stitching. Show all posts

Monday, January 30, 2012

Magical Challenge ~ Creative Scrappers# 192


SEE  - I told you Scrapbook Challenges were addicting!!  ( well at least for me!)

OKAY - here is the Sketch I used for inspiration  ( 'cause we all need a little from time to time! LOL!)


So - I took this in a little different direction....
I hope you like it as much as I do!  I am so happy with how it came out!

Instead of Stars - I went with Hearts <3 !  I used more of the paper and embellies from My Mind's Eye, Stella and Rose collection, some Bazzill, and these ADORABLE fabric THICKERS from Amy Tangerine!!  In keeping with the stitching detail on the letters - I decided I needed to do a little hand stitching on this layout too!  Of course I had to add some BEADS from ArtC's Natural Bead collection!

I just LOVE all the colors in this collection!  You can get a good look at the distressing on all the edges - I again used Ranger Distress Stain in Rusty Hinge - you can really see it here on the photo - COOL huh!?  Oh - and this is a good close up of the hand stitching too.  See the little flap I folded over and did a Zig-Zag stitch on?! FUN!!  The tag you see is sprayed with Tattered Angel's GLIMMER MIST in Golden Terracotta and Sunflower - I used a PRIMA Swirl mask to get that cool look!

Here is another close up of the stitching and beading, and the cool canvas letters! Oh - I used Ranger Distress Stain in Barn Door Red to give the color and dimension to the red hearts too!

Here is an angle shot -to show you the dimension.  I added the center photo with HELMAR ZapDots - LOVE THEM!!!

So   - THANKS for stopping by - I hope you liked my take on this sketch challenge, and that I've inspired you to CREATE SOMETHING!!  ( get out your needle and thread and "have at it!" LOL!!)

(( HUGS)) ~ Sherri


Thursday, November 17, 2011

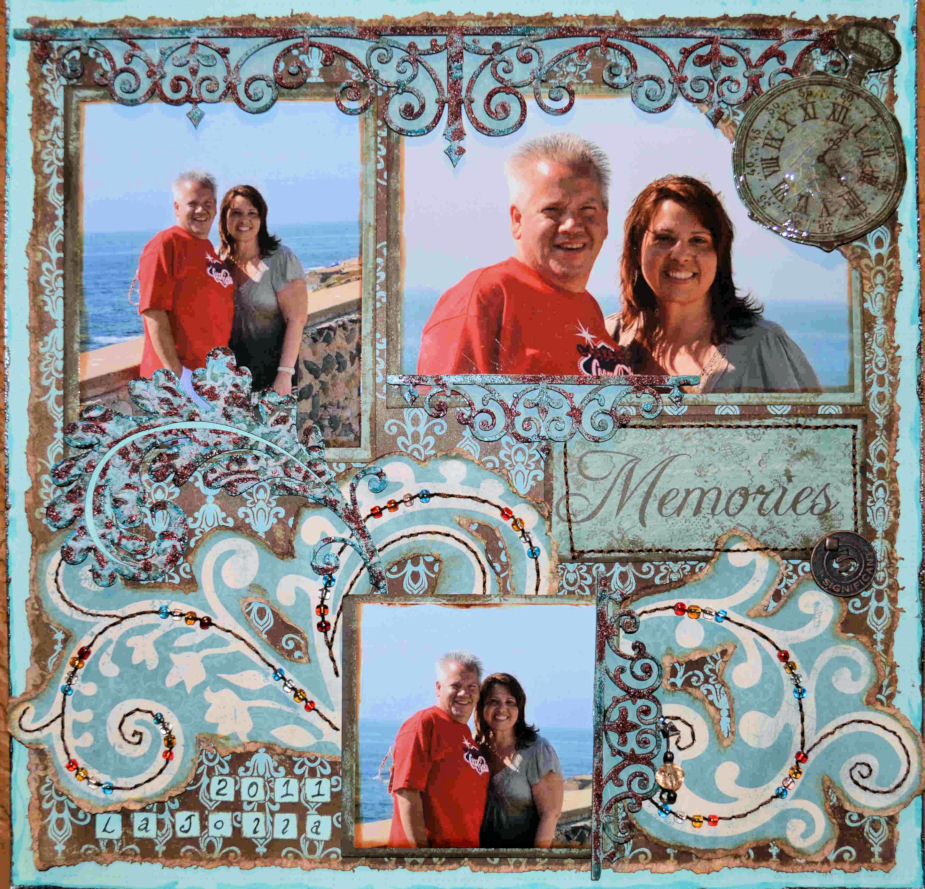
Beautiful La Jolla


Hi Everyone - just wanted to share this layout with you.  It is my first real attempt at stitching - and it was so much FUN - I hope it inspires you to try it.  I didn't use a template or pattern - I just pre-poked holes along the swirls as evenly spaced as possible and stitched away!  Of course I couldn't "just stitch" so I added a few beads to the stitching to tie in the red of my hubby's shirt.

I am sorry, but I do not remember the name of the paper line that I used. I selected it from my "stash" as I thought the blues and browns really picked up on the beautiful colors of the rock wall and the Pacific Ocean.  This picture is from our summer vacation, when we were in beautiful La Jolla California for the day. 

I actually only used 3 pcs of paper. The swirls were cut out of the center of the blue paper you see as the beginning base.  The brown and blue pattern is paper # 2, and the word "Memories" the watch and the paper behind the chippes was from piece #3.

I used a water tearing/distressing technique to "cut out" the paper swirl designs from one piece of paper, and along the edges of the brown and blue pattern sheet too.  Those edges were further distressed with Vintage Photo Ranger Distress Stain ( one of my new favorite products!) 

I also wanted to show you how much fun and how versitale Dusty Attic Chippies can be -(this big one is called Foliage DA0506) -  I ran it through my CuttleBug first to give it texture. I gave it a light/thin coat of gesso then sprayed it with Patina Glimmer Mist, and added some Mermaid Glimmer Glam, along with some Waterfall Glimmer Glaze -"here and there."  To tone it all down and make it a little more rustic, I used Ranger Distress Embossing powder in Fired Brick to add some more RED to the layout.


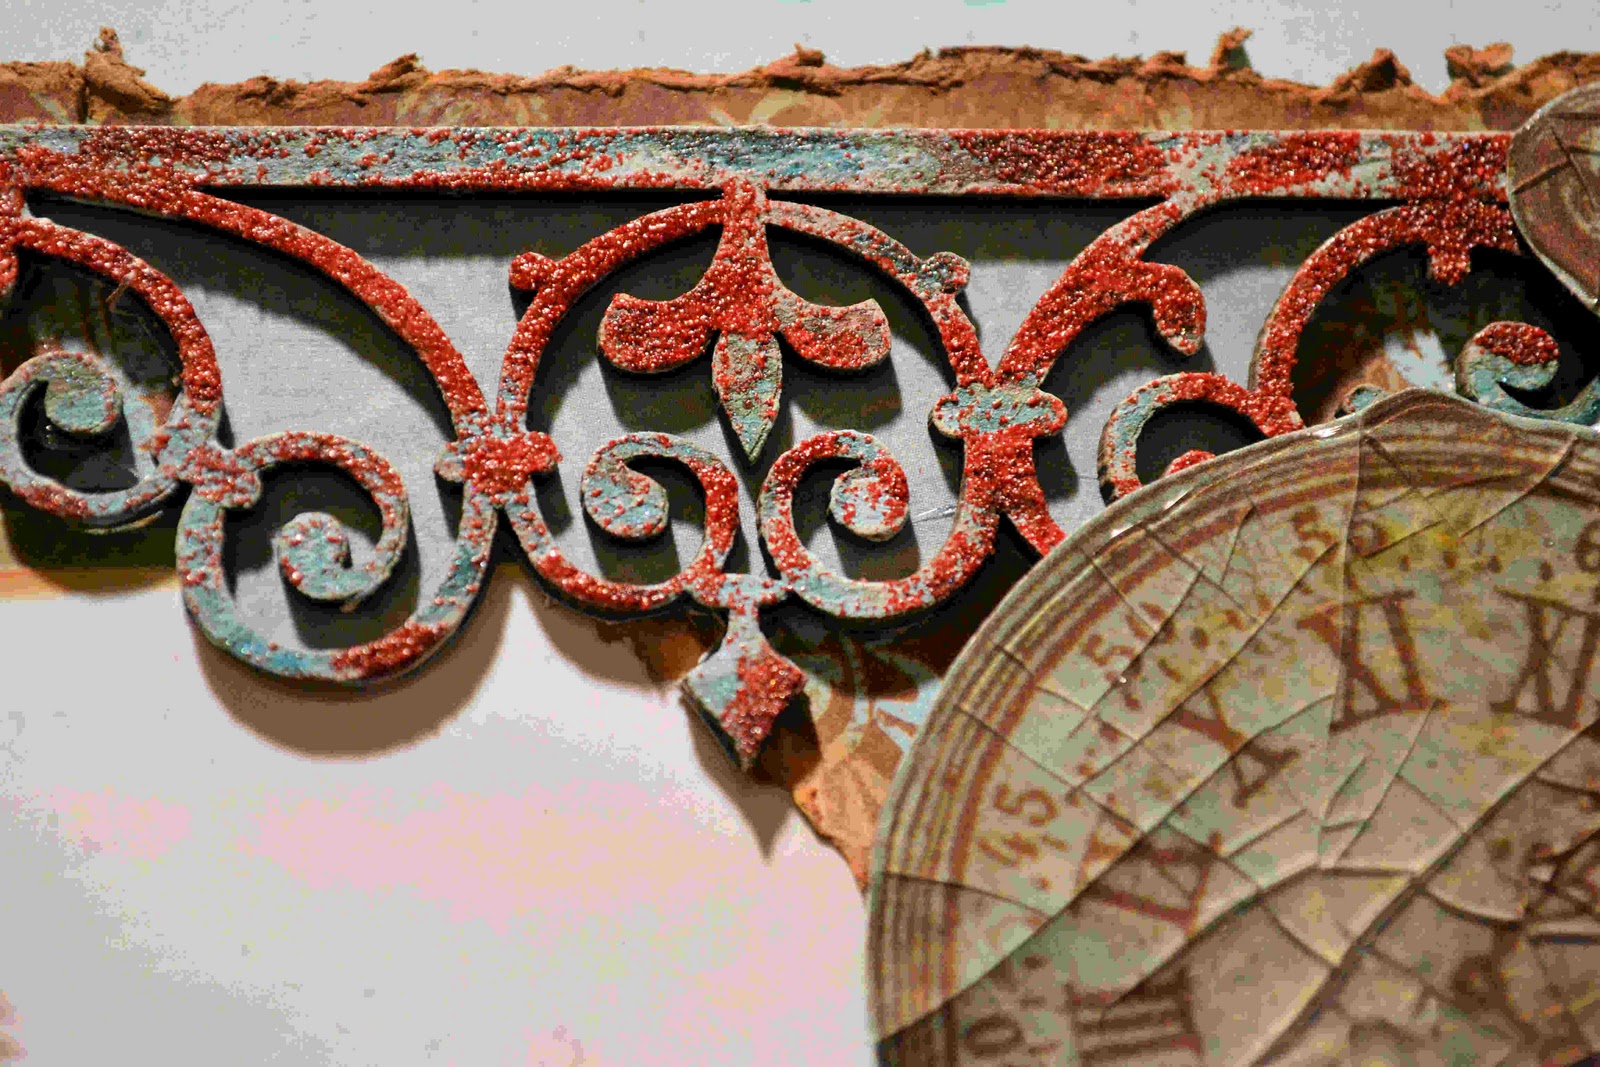
I just LOVE the Wrought Iron Trim Chippie by The Dusty Attic too!  ( DA0547 below) I used the same technique on these 3 pcs as I did on the flourish - but I did not run it through the CuttleBug first.  I also backed all of the chippies on a light blue paper, then cut around the edges with an Exacto Knife, so that they popped and stood out a little on the busy patterned paper.  ( time consuming -but I think well worth it - don't you?!)


The paper watch in the upper right corner was covered with Royal Coat Dimensional Magic, then I bent it to make the crackles. The close up is below.
Thanks for stopping by  - I hope I inspired you! Now get out your needle and threads and have at it!! LOL!!
Happy Scrappin'
Sherri
PS - all of these products were purchased at my FAVORITE Local Scrapbook Store: Scrap-a-Doodle Doo  You can shop them on line 24/7 if you are not in the area - but PLEASE support your LOCAL SCRAPBOOK STORES!