Pages

Friday, December 19, 2014

Looks like 2015 is turning into a "Scrappy" kind of year!

Hello my Scrappy Friends!    
Big Scrappy "Good Stuff" going on here lately!

If you didn't catch it on my previous posting
I was selected to be on the 2015 Design Team
over at the Challenge YOUrself Blog!

AND - Now I am EXCITED to announce that I was also selected to be on the Design Team 
at THE MEMORY NEST's  Blog too!  

This is another FUN and EXCITING BLOG, and I can't wait to "play around" with these very talented ladies in 2015! 

There is always LOTS of Crafty Goodness going on over there - Please stop by and check it out and I hope you will all be playing along with me at The Memory Nest too - in 2015 -
because who doesn't love a good Scrappy Challenge or two?!!   

Wishing you and yours a very Happy Holiday 
and a very Merry Christmas  
with a 2015 filled with ONLY GOOD things.
I am hoping some of those will be Happy Scrappy ones too!

((HUGS)) ~ Sherri

Wednesday, December 10, 2014

2 Page "INSTA-CHRISTMAS" Layout Class - Jan 16th at THE DOO!!

Announcing My Next Class at "THE DOO!"


I am so happy to tell you that after a brief "Hiatus" where "Real Life" got in the way of "Scrap Life!" -  I am BACK to teaching Classes at my FAVORITE Local Scrapbook Store 
- aka -"My Happy Place!"


SO - Please SAVE THE DATE!  
Friday Night, January 16th at 6:30 -9pm at
37-C Swan Street 
Ramsey, NJ 
Please Call: 201-818-7060 to reserve your seat/kit
CLASS COST: $25.00 per person

Here are a few details and some SNEAK PEEKS of 
the Class which I am calling:

"INSTA-CHRISTMAS!"

This 2 page 12 x 12 Layout Features Mats/Places for 
(5)  4x4" photos - Perfect for those SQUARE Instagram Photos you are taking and "storing" in your phone!! And don't worry, if you are not on Instagram, you can trim your 4X6 Photos to fit the mats :-)

It also has a semi-hidden Pocket with a Tag for  journaling -and you could also add some extra/loose photos in there too!  

We will be mixing up LOTS of different patterns, as well as using Washi Tape, Sequins, Gold Snowflakes 
and Creating banners, 
with Paper Twine, "Postage Stamps," 
and making a few Christmas Trees too!

So here are the Sneaks I promised you!:


Seating will be LIMITED 
- and a FEW Kits will be available too!

Students should bring the following to Class 
-to complete the layout:
12x12 paper trimmer
Small Sharp Scissors
1/2" thick 3D Foam Dots - various sizes
3M Quick DryLiquid Glue and Adhesive Tape Runner
Small Zot Dots ( for Sequins )
Ranger Distress Stain - Tarnished Brass 
(or any brown will work too but the gold looks great!)
** All items are available or can be "pre-ordered" 
from Scrap-a-Doodle Doo.

I hope you can make it - 
Please CALL THE STORE 201-818-7060 
to reserve your seat/kit - ASAP!


Thanks for stopping by!

((HUGS)) ~ Sherri

Sunday, December 7, 2014

Challenge YOUrself #13: Traditions & SBC #422

Hello Everyone!

I'm so excited to be posting my First Design Team layout for the 
Challenge YOUrself Blog!

This month's Challenge is all about Traditions - here is how it goes:
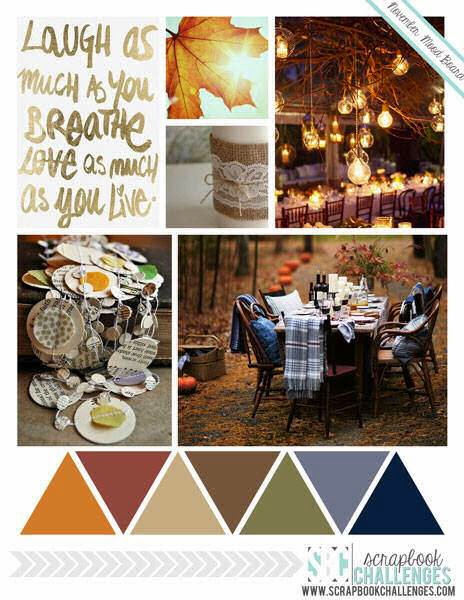
What are some of your traditions for the upcoming holiday season?  
Do you have an old tradition that you continued from childhood
or did you start your own? 
Tell us about it and be sure to include a photo with YOU in it 
when you play along!  
This "TRADITION" Challenge will close on January 4th, 2015.  

~~~~~~~~~~~~~~~~~~~~~~~

My favorite Holiday is Thanksgiving.  I LOVE to cook, I LOVE making people happy with food that I prepare, I LOVE that we spend the day together as a family, laughing, eating, playing board games and watching football!
I LOVE the MEMORIES!

I LOVE that it is a time to reflect on our many blessings, and remember family members who are no longer with us, and who have graced our Thanksgiving Tables throughout the years.

One of those people was my Great Great Aunt Ethel.  It is in her house where I remember my first Thanksgivings.  It is in her house where we now live and have raised our family, 
and where I now host our Family Thanksgivings.
Aunt Ethel's Thanksgiving Table was always FULL of delicious food, and our table still includes her stuffing recipe!

Her cut glass pitcher was handed down to me, and quite a few years ago, I started the TRADITION of making Bloody Mary's in it. We enjoy them while we are gathered together, and waiting for the Turkey to finish cooking, and while my Dad carves the bird.  It sits on a shelf in my kitchen throughout the year, and is only used for Thanksgiving Bloody Marys.

I LOVE using these fall colors, and really had fun using my Cuttlebug and Tim Holtz Dies to make all of the leaves for my "piles!"  I used Distress Inks and a foam applicator on all of the edges of the leaves and papers.  I had a blast making the leaves change colors right before my eyes!

***I Double Dipped this one too!***
This layout was ALSO used as inspiration over at The Scrapbook Challenge Blog, where I am also part of their Design Team!  
I love participating in and challenging myself to incorporate 
2 challenges in 1 layout! 
You should try it sometime! It is LOADS of FUN!!

Here is SKETCH #422 from over at The Scrapbook Challenges Blog that I used for this layout:
This SKETCH challenge is Open until December 31st - so please play along!


Here are some close ups of the Layout with some more details:
I decided to make a pocket behind the photos, so after matting them, I added them to to page using 3D Foam ZAP DOTS, so that I could journal on the tag, and tuck it behind the photo, telling the store of the pitcher.  I added a few acorns and leaves to the top of the tag too.

 I really am in love with the piles of leaves I was able to create.  Inking them with distress stain and watching them change color and come to life was so much fun.    I also sprayed the leaves, with Butternut Squash Glimmer Mist, to give them a little shine! You can see the chipboard Chicken-wire from The Dusty Attic that I placed under the photo mat, in this picture.  I first hit it with Versamark, then sprinkled a few different colors of Distress embossing powder on it - then hit it with the heat gun.  I also embossed the chipboard heart in the upper right corner with Distress Embossing Powders too!

Here are the items used in this layout:
(all purchased at my Local and Online Scrapbook Store

  Bazzill Cardstock - Capers, and scraps of yellow, orange, kraft and burgundy cardstock to make the leaves
Simple Stories -Generations Collection: 
Together, Home Sweet Home, Live Love Laugh
Tim Holtz Dies: Tattered Leaves, and Tattered Gatherings
Ranger Distress Stain : Tarnished Brass 
Dusty Attic Chicken-Wire Panel #DA0177
Ranger Distress Embossing Powder: Fired Brick, Tea Dye, Antique Linen, Spiced Marmalade, Goddess Gold
Ranger Distress Inks: Aged Mahogany, Gathered Twigs, Mustard Seed, Wild Honey, Spiced Marmalade, Barn Door, Ripe Persimmon, Rusty Hinge, Crushed Olive, Vintage Photo.
Fisker's Punch # 51791
Tattered Angels Glimmer Mist: Butternut Squash
3 D Foam Dots
Thickers - Sunset Gold
Letter Stickers
Dew Drops

If you've stuck with me and made it to the end of this post - 
I THANK YOU - and invite YOU to play along with one or both of these challenges!  You can find them here:

I can't wait to see what you create!
((HUGS)) ~ Sherri


Monday, December 1, 2014

WOO HOO! My Layout made TOP 3 at SOS!

Hello my Scrappy Friends!

I just wanted to share some exciting news with you!

My Layout made it into the


Below is the layout that I submitted for the challenge.

I used LOTS of STUFF from my STASH! 
( 99% purchased at my LSS Scrap-a-Doodle Doo )   
AND - I had a BLAST doing it!!


This challenge made me pull out my Glimmer Mists and Stamps -  that I haven't used in MONTHS! And that MICKEY Sticker is from our 2011 Trip to Disney World!! 
OH MY!! LOL!

I hope you visit the Scrap Our Stash Blog, become a follower and play along - LOTS of FUN and INSPIRATION going on over there!  Hope to see you there! :-)

Thanks for stopping by!
((HUGS)) ~ Sherri

Saturday, November 29, 2014

DT Call over at The Memory Nest!

Hi Everyone -  I found another GREAT blog to follow!!

Please go check out all the great inspiration going on over at 


They are also having a DESIGN TEAM CALL - so I thought this would be another great way to share and inspire you to "Get Scrappy with it!"  I created a layout based on the challenge sketch provided.  Please CLICK HERE and kindly scroll down and CLICK on my sketch that is linked up if you like it! :-) 

You have until midnight on December 3rd to do so! 
(THANKS!)


Here is the sketch :


And here is my "take" on it!


I LOVED using my new Tim Holtz Film Strip Frames die!!

I used LOTS of papers and elements/embellishments from the Fancy Pants Designs "Memories Captured" line in this layout. 

The base is a piecs of their black corragated cardboard - that I inked with Brushed Pewter Distress Stain. Many of the elements were stickers that I matted on Bazzill Cardstock, and pop-dotted with 3D Foam squares - and HOW ABOUT that special CUSTOM die cut from my friend "Mama Doodle" from www.shopthedoo.com   

How  "#awesome" is that?!! :-)  LOVE IT!


Here is a close up ot some of the detail, including the Fancy Pants Designs "Oh Deer" Sequins, and 2 of my favorite Scrappy Friends - and yes, that is a #selfie! from one of our Weekend Crops!

Thanks for stopping by - and again, please take a minute to check out my entry over on The Memory Nest's 2015 Design Team Call post, and click on the photo of this layout on the bottom -the more clicks, the better chance I have of joining the team over there - so I can continue to share and hopefully inspire you!

Don't forget - the CALL Closes 
at Midnight on December 3rd!
Thanks again,

(Hugs) ~ Sherri

Tuesday, November 18, 2014

Challenge YOUrself Sketch #12 & Scrap Our Stash

Hello Everyone!!  I am so excited!  While surfing the web, I found two great new Challenge Blogs!

The first one is called Challenge YOUrself!
It is not just a sketch blog, there are all different kinds of challenges, and each one requires a photo of YOU.  

I am sure many of you are like me, and are usually at the other end of the camera.  This Blog allows us to document OUR lives too, just like we document others in our lives. 
I may have to get a SELFIE STICK -  My friend Fran has one - I think I'll put it on my Christmas List! 

Well, this month is a SKETCH Challenge - YOU can see all the info, rules and prize pack HERE:
  Challenge YOUrself Challenge #12

Here is the SKETCH:
I also decided to combine this Sketch with a really FUN Challenge going on over at SCRAP OUR STASH !  You can get all the details HERE:  November Countdown Challenge - but basically, I had to use the following elements from "my stash" - and yes, 
I do have quite a "stash" if I say so myself!
( yes, and I'm sure you do too!)

5 ~ Patterned Papers
4 ~ Stickers or Cardstock Stickers
3 ~ Numbers
2 ~ Stamps or Rub ons
1 ~ Paint or mist

So - after the First REAL Challenge of selecting a photo of "ME" - I gathered all the required elements and 
"Got Scrappy with it!"
Here is my take on the Sketch.
I've included all of the elements(and then some!):

I can't tell you the last time I used my "Elixir's of Life" as I call them, or better known as Glimmer Mists!  And Stamping!!??  
Not one stamp, but I used 4 of them!!  
For those of you that know my "style" - 
the 5 patterned papers were pretty easy for me 
- because I love "mixing it up!" 


  I decided to pick up the yellow/gold color of my lanyard in the photo and on Mickey's shoes in the sticker 
and use it as an accent color. 

 I've had those big chipboard numbers "FOR-EV-ER!" so I thought they would make a great title.  I inked them with Salty Ocean Distress Stain, edged them with a black Sharpie Marker, then went over them with a Blue Wink of Stella Brush, 
to make them "sparkle!"


 All in all, I am happy with how this came out, 
I had LOTS OF FUN, and used up "some" of my stash too 
- especially by combining the 2 challenges!

HERE are the links to the challenges:
Scrap Our Stash Challenge #20 - Link up by Nov 29th
 Challenge YOUrself #12 - Link up by Dec 4th

Here are all of the elements I used:
(all of which were purchased at my Local Scrapbook Store
 ~ Scrap-a-Doodle Doo!)
Smooch Spritz: Sea Breeze / Navy Twinkle Paint
Tattered Angels Chalkboard Glimmer Mist: Teal High Heal
Jillibean Soup White Simple Circles
Prima Mask
Prima - Build a Swirl Stamp Stamp
Close to My Heart -Picture Perfect Stamps
Technique Tuesday -Smile Big Stamp
Tim Holtz- Grid Blocks
Ranger Distress Ink - Black Soot
Ranger Distress Stains: Salty Ocean/Black Soot/Barn Door
Wink of Stella Brush -Blue
Mami Stickers
Simple Stories - "Say Cheese" Fundamentals Cardstock Stickers, Seeing Stars, Best Day Ever
Splash of Color -Magic Cruise Collection: At Sea / Bon Voyage
For my 5th Paper, I used a scrap with printing to mat the photo
Chipboard Numbers from my stash 
Zap Dots 3-D 1/2" foam Dots
EK Success - Swirly Mickey Punch

You've still got lots of time to play along with either or both of them - There is that long Turkey Day weekend coming up remember -so if you don't eat too much Turkey, and end up sleeping the days away - why not play along too!

Challenge YOUrself to SCRAP YOUR STASH!

Thanks for stopping by!
Have a Blessed Thanksgiving!
((HUGS))~ Sherri

Monday, November 17, 2014

Crop Memories - Sketch #420 for SBC

I'm back at it - scrappin' my stash, and a photo from 2010 too!

Sketch #420 from the Scrapbook Challenges BLOG 
allowed me to do just that!

Here is the AWESOME Sketch -


and
Here is my take on it!  

This is a picture of me at Scrap-a-Doodle Doo's January 2010 Winter Wonderland Crop Weekend, holding the adorable themed cupcake dessert that was made by my talented friend / crop buddy Pattie! Isn't that snowman sweet!?  He was very yummy too!  I love my scrappy weekends with my friends. They are always filled with lots of creativity and lots of laughter!  

I was able to journal a little on the back of the tag that I tucked behind papers on the right side of the layout, (that has the date of the crop written on the front.) 
 I used paper that was given as the gift that weekend and I LOVED that I was able to use my custom made #scrapadoodledoo stamp on this layout too! (Of course, I can't find where I put the strip that was along the bottom with the name of the paper on it!  - Might any of my other cropping buddies out there still have it?  Can you let me know the name if you do??  THANKS!)

I was able to use lots of bling, brads, some washi tape, ribbon and buttons that I've had forever - even that piece of Red Punchinella too! The words on the left are from a Tim Holtz Idea-ology Chitchat Word sticker pad. The title was made with the #scrapadoodledoo stamp, and words that I cut out of the paper scraps.

Thanks for stopping by -I hope this sketch and layout inspire you and you get a chance to "get scrappy with it."  
Come on - give this sketch a try!

((HUGS)) ~ Sherri

Wednesday, November 12, 2014

Falling into Fall - SBC November Mood Board + a Sketch Challenge

Fall is one of my favorite times of the year.  I am sure it has to do with all of the warm and wonderful colors, that change all around us each and every day.

This month's Mood Board Challenge over at Scrapbook Challenges Blog includes lots of those colors, plus some beautiful inspiration, with a little "Golden Goodness" thrown in. ( Who doesn't like a little BLING!?) 


I also decided to make this even more interesting by making this a DOUBLE Challenge for me, and will also be playing along with the folks at The Memory Nest, - using their Make it Monday Sketch Guide #28:


I've had these 2 photos of our now 3 year old Portuguese Water Dog, Maggie ( aka Reel Life Princess Magdalena of the Sea) since last November and thought that they would be great to use in this "combined" challenge.  Maggie had just been to the groomer for her new hair cut. This is called a "Lion Cut" with a shaved backside and nose.  These dogs have webbed feet and use to help fisherman with nets, retrieval and even messages from boat to boat back in Portugal. Leaving her hair longer around the chest helps to keep their vital organs warm, and their shaved hindquarters help with swimming. At one time, there were less than 100 of them left in the world.  They are very smart, hardworking (aka -always "busy") and extremely loving and loyal.  Isn't she a BEAUTY!


Once again, I was able to "Scrap My Stash" with LOTS of goodies that I've purchased from my Local Scrapbook Store, SCRAP-A-DOODLE DOO.   (MAJOR Website upgrade is in progress -watch for their "re-opening" soon!)

I LOVE this honeycomb base paper, and have been holding onto it for quite sometime.  I've hesitated using it in the past because I like it so much and didn't want it to be "gone." - Do any of you do that?  Like a paper so much that you don't want to use it?  Is that wrong??  ( I think not! ) That is why I always buy 2 pieces of papers that I LOVE - ( yea, yea - I've got 2 of about everything - fess up - you probably do too!!)

Well, I am glad I saved it, because it think it works great with this sketch and mood challenge!  I used Vintage Photo Distress Ink, applied with a foam applicator around the edges to give the base page a little depth. - I haven't done that in a while -and I had a blast!


Below you can see where I decided to make a pocket, using foam dots, behind the photo of Maggie's new hair cut and stuck a tag in there for journaling.  ( By the way, did you know that Portuguese Water Dogs have hair, not fur?  They are non-shedding, and need to be brushed, groomed / cut regularly, as their hair keeps growing!)


I cut the 2 little Tickets from a sheet of Prima paper with lots of little paper embellishments, that I think I got from my friend who was "de-stashing" - yea, I know - who does that???!!!  (NOT ME!)

Anyway....  I thought they were PERFECT, so I cut them out and popped them with foam dots near Maggie's pictures.  The tickets say "These are some of my most favorite memories with you" and "Best Friends Forever" ~ Because they are - and we will always be.... Love my Maggie Girl!


I used a piece of burlap along the bottom of the patterned papers (that were also Distressed with Vintage Photo Ink) under the photos, and then began to "build" my pile of leaves and sticks.

I have to tell you,  I LOVE this Tim Holtz Die  - Autumn Gatherings! When it came out, I had to have it!!  I think I've only gotten the chance to use it one other time, BUT after cutting 4 different colored papers with it for this layout, and then inking the leaves and sticks with different Distress Inks with a foam applicator, to try to make them look "real" (and I am lovin' how they came out!) I know I will be using it more often!

I added a few leaves and acorns by the tickets too, to join everything together, then scattered a few gold sequins around to "Bling it up" a little!  - If you have seen my previous layouts, you would know that I am not one for leaving very much blank space, so this sketch was really a challenge for me!

I knew my bright gold letters from Momenta would make a great "Fall" title, and had them in mind when planning out the layout in my head.  The little strips of journaling at the bottom were also cut and then inked, from the sheet that had the tickets on it.  I journaled on them with a gold pen "#morningswithmaggie" and "#loveher"


You can see more photos of Maggie on Instagram if you search those Hashtags.  Oh - and if you think Maggie is cute - you should see her little "brother" Tino too!  You can follow me on Instagram "Shercara" or search for #morningswithmaggieandtino to see more of their photos and even their antics on video too!

Thanks for stopping by!  Hope you join in on one of these challenges - or be daring and try them both too!!  ;-)

((HUGS)) ~ Sherri

Products used :
Momenta Gold letters
Tim Holtz Autumn Gatherings Die
Distress Inks - Colors: Mustard Seed, Spiced Marmalade, Vintage Photo, Crushed Olive, Aged Mahogany
Distress Stain - Tarnished Brass
My Mind's Eye - Lost and Found - "Oliver" Yellow Honey Paper
Prima Marketing - Songbird Collection from 2012 -"Title-it"
PinkPaislee - Prairie Hill - "Kit Strings"
PinkPaislee - Prairie Hill - "Spools"
Simple Stories, The Story of Us -SNAP Collection, Die Cut Cards Paper Yarn/Twine
Burlap
Sequins
3D Foam Dots


Monday, November 10, 2014

Summer Memories Sketch #419 Scrapbook Challenges Blog

It has been very chilly here in NJ, so it must mean winter is really on the way!  

I decided to ignore that fact for a little while longer and use some summer photos for my DT Layout for
SCRAPBOOK CHALLENGES.

First here is the VERY FUN Sketch #419


Why do I say it is "FUN" - well, if you don't know by now, I LOVE mixing up patterns and textures, and this sketch is perfect for it and allowed me to do it -in a very big way- as you can see in my layout below, using photos from our 2013 vacation to North Topsail Beach, NC


One of the things I love about doing sketches is that I try to use up the "STUFF" I have in my stash, and this sketch is FULL of all kinds of "STUFF!" 

I used paper, stickers and chipboard from the Creative Imaginations Tidepools Collection by Christine Adolph - that I bought at my Local Scrapbook Store  SCRAP-A-DOODLE DOO, (quite a few years ago I'm thinking!)  I added some netting, paper yarn for the banners, seashells and even some Beach Glass Mud Puddles under the shells on the bottom left of the page.

On this close up, you can also see how I decided to make my banners out of circles that I folded over, and stapled to some paper yarn, and created a sparkly layer behind the first layer of circles to make them "pop!"  ( I think they kind of make the banner look like mermaid scales -well sort of - kind of...??)

More sparkly fun was had with a little misting!  Notice the Trunk Bay Glimmer Mist that I sprayed on the manila title and the tag I used for journaling?  I also gave the base page a few sprays before adding the photos and embellishments too!

Oh, speaking of the tag, I actually created a "Pocket" for it, by leaving the top of the bottom left base patterned paper open, so I could slide the tag in it.  This is a cool way of hiding journaling in a layout.  It doesn't take away from the layout design, and hides your handwriting if you don't really like it. It also allows you to write on the front and back - so you can save your thoughts and memories of the time / photos used in your layout!

Thanks for stopping by!  Be sure to check out ALL the Design Team Submissions over at the SCRAPBOOK CHALLENGES BLOG, and I hope you will play along with us this month!

((HUGS)) ~ Sherri


Monday, November 3, 2014

Starbucks!

STARBUCKS!!

What more do I have to say??? 

You either LOVE it - or you don't - 
and if you LOVE it - you'll get what I mean when I say

STARBUCKS!!

I - as you can tell, I LOVE IT!!

This is a layout I made from our visit to Old San Juan, Puerto Rico, this past September, at the end of our 14 night Disney Westbound TransAtlantic Cruise.  We spent 2 days there, and visited STARBUCKS on each one of them!
Good thing it was just around the corner from our hotel! :-)


I used the city map I had saved of Old San Juan, and have an arrow pointing to the location of the STARBUCKS!

The overlay, which includes the 2 green frames, the "famous" Logo, coffee beans and the shape of the cup, were made and purchased from Mary at http://www.originaloverlays.com/

The cup was originally solid green like the rest of the overlay, but I "jazzed" it up a little with some white and black cardstock, along with the logo part of the cardboard cup wrapper, and one of the green sticks that keep your drink warm and from spilling, that I got from STARBUCKS!  I pop-dotted just the cup portion of the diecut too.

I accidentally printed 2 of the photos on the bottom left, so I fussy cut myself out of one of them, and then pop-dotted "me" on top of the photo in the mat.

Thanks for stopping by - I hope you get in some scrappy time this week!

((HUGS))
~Sherri

Sunday, November 2, 2014

I haven't been everywhere but....

I've been to BARCELONA!! - Actually this was our 2nd trip to Barcelona, the first one was in 2007, and we really enjoyed it so much more this time!  We hope it is not our last trip there!

Most of the paper used was from Kaisercraft's Close Up! Collection - from my favorite Local Scrapbook Store Scrap-a-Doodle Doo in Ramsey, NJ  - or on line at www.shopthedoo.com

I made this layout at one of their AWESOME Scrapbook Weekend Crops, and was also able to use up lots of my "stash" too. 

I really liked this photo of my husband and I at Placa Catalunya during our stay in Barcelona before our TransAtlantic Disney Cruise in September of 2014, so I printed it with 4 different finishes, and cut the photos different sizes, then added them to the layout along with some black rub-ons too!


I find duplicating the same favorite photo in different ways helps to add to a layout, when you only have one photo of an event, or location.


I hope this little trick inspires you - Have fun creating!

Thanks for stopping by - say "Hello" if you'd like :-)

((HUGS))
~Sherri

Formal Magic !

Formal Night on our Westbound Transatlantic Cruise on The Disney Magic this past September.  Our journey was 14 nights long, and took us from Barcelona, to Malaga, Spain, onto Tenerife in the Canary Islands, before crossing the Atlantic, and arriving at Antigua. St. Maarten, St Kitts, and finally ending up in San Juan.

We had a F A B U L O U S time, a G R E A T group of Tablemates, W O N D E R F U L weather, and a very smooth crossing.

There were 2 Formal Nights, and this layout captures one of them, along with M*I*C*K*E*Y  himself!


I tried to only use Black, Silver and Bright Green embellishments to compliment the "Formal" photo - and of course I had to add LOTS OF BLING! 

Thanks for stopping by - I hope this layout inspires you to make a little "MAGIC" of your own!

((HUGS))
~ Sherri

Sometimes its not all about paper....

While I love scrapbooking, I also love to cook!  It is another way I can create and be inventive.  I love making up recipes that I "taste" in my mind before they become a reality, and I think that 98% of the time, my "concoctions" come out the way I planned them!

My oldest son eats a Vegan diet, and I try to cook something that both he, and the rest of the family will eat as often as I can.  When I saw this big box of Black Bean Pasta at Costco a few weeks ago, I thought it would be a great healthy way for all of us to enjoy pasta, and get lots of great protein and fiber while we were at it.


Well, black beans make me think Mexican, so I FIRST took a block of Extra Firm Tofu and pressed it in a colander between paper towels, and with a heavy pot on it to squeeze out much of the water.  I let it sit for @ 1 hr that way, then diced it up in @ 1/2" cubes.  I then blended the following spices:
1 Tablespoon Garlic Powder
1 Tablespoon Chili Powder
1 Teaspoon Cumin
1 Teaspoon Coriander
1/2 Teaspoon Cayenne Pepper
1 Tablespoon Smoked Paprika 
Salt and Black Pepper
I tossed the Tofu with the spice mixture then put it in the refrigerator for @ 2hrs.

When ready to prepare dinner - Add a little Olive Oil to a deep saute pan and add the Tofu.  Stir and cook until some of the sides are a little crispy - remove from pan and set aside.

To make the sauce - add a little more Olive Oil to the same pan with the left over seaonings and Saute the following:
1 Large Onion - finely chopped
1 Large Red Bell Pepper -1/2 finely chopped, 1/2 coarsely chopped
1 Med. size Jalapeno Pepper - NO SEEDS, finely chopped
3-4 Cloves of Garlic -finely chopped
2 Teaspoons Garlic Powder
2 Teaspoons Chili Powder
1/2 Teaspoon Cumin
1/2 Teaspoon Coriander
1 Teaspoon Smoked Paprika 
Salt and Black Pepper


Once they are translucent / soft, add:
1/4 Cup Balsamic Vinegar
(1) 14.5oz Can of Diced Tomatoes - not drained
(1) 11oz Can (drained) of Green Giant Mexican Corn (with peppers)

Let it all simmer on low to reduce some of the liquid - if needed -thicken with a little arrowroot or cornstarch.  Then add the Tofu that you set aside.

Now cook the Black Bean Pasta according to the directions - I used about 3 handfuls - ( it came in a big box with just one big bag -so I guessed how much for 4 servings - we ended up with enough for tomorrow night too!)
I only cooked it for 7 mins - then drained it and rinsed it with cold water.

I then added @ 3 Tablespoons of fresh chopped Cilantro to the sauce and tossed it all together in a big bowl - sprinkling a little more chopped Cilantro on top.
We all enjoyed it and are looking forward to leftovers tomorrow!

*Disclaimer - This Black Bean Pasta is NOT a substitute for regular pasta - if you try that, you will probably be disappointed. While it does not have a strong black bean flavor - does have a different texture than regular pasta.  I've done some research on Pinterest, and hope to try a version of shrimp scampi with it, and maybe a roasted butternut squash version too!  Stay tuned....  :-)

Thanks for stopping by, let me know if you try this -or if you have any other ideas!

((HUGS))
~Sherri

Monday, October 20, 2014

OH MY MY - How Time Does FLY!!

WOW - I can't believe it has been 4 months since my last post!!  YIKES!!

Fortunately, I have been blessed to have been busy with (mostly) good things!

  • JULY - My beautiful niece's wedding! (WONDERFUL!)
  • AUGUST -My husband injuring his knee and requiring physical therapy (Not so good)
  • SEPTEMBER - Being BLESSED to be able to take our much planned for Disney Magic TransAtlantic Cruise! (FANTASTIC!)
  •  OCTOBER - My husband had to have knee surgery and is now recovering and going to PT, (more not so good,) and we celebrated our 32nd Wedding Anniversary!! (WOO HOO!)
Well,  I really needed to get some scrap/creative time in - and I was able to squeak in 2 layouts for the Design Team over at Scrapbook Challenges Blog for the month of October!!

I am sharing the photos and links to the SKETCHES on the  BLOG below, so that you can play along too!  We'd love to see what you create!

Here is SKETCH # 415


Here is my take on it ~  Tequila Tasting!


There were lots of "Sea Days" on our 14 night cruise across the Atlantic, ( 9 to be exact!) and quite a few of them were filled up with different "Tastings" as well as relaxing in the sun, on beautiful smooth seas!   


and...
Here is SKETCH #  416


and here we are "Gettin' Goofy with Goofy!" while sailing somewhere in the middle of the Mediterranean Sea, on our way through the straights of Gibraltar!


One of the "FUN" parts of the trip were the photo ops with the characters - and Goofy is one of my favorites! I Love his Spanish Flamenco Dancer outfit!  We had just left Malaga Spain, and were on our way to Tenerife, in the Canary Islands!

I hope you enjoy these layouts - you have until October 31st to submit your layout for any of this month's challenges - just CLICK HERE for the InLinkZ Link to post your entry!

Come on - Get Sketchy with it and play along!!!

Thanks for stopping by,
((HUGS)) ~ Sherri

Wednesday, June 18, 2014

Behind the Layout

Behind the Layout - is a feature on Scrapbook Challenges Blog that gives you an insight into the Design Team Member's thought process, as they begin the process of creating a layout, using a sketch.

I'd like to share a little "behind the scenes" info with you, on how I put together my layout for SKETCH # 396.   First off - the sketch is a 2 pager.  Now, I've pretty much been a 2 page scrapper for most of the years I've been scrapping, but I'd say, over the last 2 years or so - I've really come to LOVE 1 page layouts.
Here is the sketch:


I decided to only focus on the LEFT page of the sketch ( yes, you can do that - and you can create 2 pages on 1 page sketches too - so don't ever let that stop you from playing along! )  I picked the left page, because I have quite a few 8x10 photos that I have sitting around from our past Disney Cruises, and I thought this would be a great way to get one on a page, and in a book!  ( PS -still not in a book! - yet!!)

SO - starting with the large photo - I decided to use Bazzill Red and Navy Cardstock to double mat it - and pop out the colors on MICKEY's jacket.  I then chose BoBunny Double Dot Designs - 12" Licorice Flourish - as the Base for the layout, and then added a piece of BoBunny Somewhere in Time ( the gold piece) along the bottom.


The pre-printed frames on the photos from Disney make scrapping them a little difficult, as they hold information and elements that I don't always want to cover up - for example, the dates of our cruise, the ship we sailed on, that it was a cruise to Hawaii, and it was Pirates of the Caribbean night.  I decided to cut a circle out of the black base paper ( before gluing down the double matted photo) and use that as the circle element in the sketch.

Next came the embellishing - my favorite part!  I love digging through my "scrap stash" to see what I can come up with, that will help to highlight what is going on in the photo, and add dimension, texture and interest to the layout.

I chose to use a piece of burlap behind the black circle and tuck a few color coordinating feathers in behind it, to create different textures.  

Other materials used:
K and Co Classic Gold embellie ??
Heidi Swapp Black and White Buzz Words
Thickers - Sunrise Gold Letters
Paper Wizard Pirate Mine Skull and Swords
Red and White polka dot Washi Tape
Jillibean Soup - Wood Sprinkles
Scrap-a-Doodle Doo Mickey Gem Head embellie
Distress Stains - Tarnished Brass and Vintage Photo

I always like to put a "Hidden Mickey" somewhere on my Disney Layouts - can you find it?

Thanks for stopping by,
~Sherri

Monday, June 16, 2014

SBC -Sketch # 398 - "MY DOG"

Hello my Scrappy Peeps!

Here is Scrapbook Challenges Blog's Sketch #398 Cool one huh??!! :-)  I couldn't wait to use it!

 As you may know - SBC Blog also adds more fun for your inspiration - by added "OPTIONAL" challenges too!  I chose to ALSO incorporate the "FULL HOUSE" Challenge into my layout!


I decided to use 2 pictures from Instagram - of 2 of my favorite subjects - my youngest son Jake, and our new puppy Valentino!  I also have been on a Black, White and Teal, "binge"  - as I think the colors go so well together!  Here is my layout - what do you think??


I had so much FUN using up paper scraps and embellishments from my "stash!"  I am so happy with how this layout came out - it makes me SMILE! -

(Behind the Scenes Note:  I really found the thought of drawing those lines around the layout a "challenge" BUT let me tell you - once I got started - I had to stop my self and say - "That's enough!"  I REALLY like how they add to the layout and bring it all together - This is definitely a "RE-DO" for me on a future layout!)

For the FULL HOUSE Challenge  - 
I used (2) Different ALPHA's  - the black and white "My," and the chipboard "DOG"

I used - (2) Colors of Paint -(1) "Trunk Bay" Glimmer Mist - on the white back ground/base cardstock, and also on top of the "DOG" chipboard - after I painted it with Ranger's "Pool" Paint Dabber, and (2)  Black -which was drops and splatters of of India Ink - FUN!


Here is a close up of the Chipboard "DOG" - I also outlined it with a Black Sharpie marker.


I used (2) Wooden Elements from QUEEN & Co. - that I purchased - along with all the rest of the items for this Layout, at my FAVORITE Local and On-Line Scrapbook Store - Scrap-a-Doodle Doo!  You can see them in the close up photo below  - along with some of the (5) BUTTONS - from my stash, and my sweet Tino's face!)


(5) pieces of Washi Tape was the last item in the FULL House Challenge - I had fun using it to cover up some items in the photo that took away from the color scheme of the layout -


That's my take on #398 - I hope it inspires you to get Scrappy With It!   Check out all the other DT Member's Layouts over on the SCRAPBOOK CHALLENGES BLOG - We hope you will play along with us!
((HUGS))
~ Sherri