Pages

Showing posts with label The Memory Nest. Show all posts

Monday, December 7, 2015

December 2015 The Memory Nest MIM #50

Hello my Scrappy Friends.   Happy December to you all!

Before I share this month's Make it Monday Challenge, from over at The Memory Nest Blog, I want to let you know that this is my last Design Team Inspiration Layout, that I will be submitting for tMN.

To say that I have had a BLAST being on this very Talented Design Team for ALL of 2015, would be an understatement.  I have so very much enjoyed working with this lovely group of ladies, and have gained inspiration from them each and every month.

I send out a BIG GIANT THANK YOU, to Leslie Germain, the Admin and Owner of The Memory Nest Blog. Your patience, understanding and support have been very much appreciated, and I am THANKFUL to have you as a supportive friend!


Okay - Now on to this month's MIM #50 Sketch  ( Please also note - there is only ONE MIM Challenge this month, as we all know December pulls us in so many ways, that scrapping usually goes on the back burner.)

LOVE LOVE LOVE this sketch - there are SO MANY possibilities !!  Here is what I did with it:


With WINTER here on the east coast, I am still dreaming of the lovely time I spent this summer out on our deck, in my backyard "oasis" or my "Happy Place" - usually accompanied by my 2 Portuguese Water Dogs, Maggie and Valentino!  This is really my favorite place to relax, and really miss it in the cold winter months.

Here is my Layout
I decided to go with 2 larger photos, and put the 2 sets of vertical rectangles together, leaving the 2 smaller photos as they are in the sketch.

 
Besides mating the photos in black cardstock, I also popped them with 3D Foam Adhesives, to give the layout some dimension. I also added a pocket to one of them, so that I could slip a Tim Holtz Idea-ology ticket in it with a little journaling.  I just love the Tim Holtz Small Talk Sticker messages too!

I thought it would be fun to drop some black India Ink on the layout - to make the colors pop a little.  Love this technique!! - What do you think?  I then added some "blobs/dots" of Ranger White Enamel Accents to brighten / highlight a few spots.

The Thickers I used for the Title are new, and I am so glad I got the chance to use them - I actually cut 2 of the words apart - "the" and "wish" to form the "this" in title!  I seem to be "hooked" on this Tim Holtz  Kraft paper pad that I used for the base of this layout. I have had it in my stash FOREVER, and I have used it on 3 of my last 4 layouts!!  I am having a creative / inky time playing with it and my Ranger Distress Stains and Inks!

Here are a few more close ups for you:


Love the flowers from Petaloo, along with the Gold We R Memory Keepers Sequin Stickers, and the different color Robbin's Nest Doo Drops too!  The patterned papers are from Pink Paislee's Prairie Hill Collection - "Country Meadow"

Thanks for stopping by, and THANKS again to Leslie and the DT at The Memory Nest Blog!  I hope you will continue to play along and wish you all a very Merry Christmas and a Happy and Healthy New Year!

((HUGS)) ~ Sherri

Monday, November 2, 2015

November "MIM" Sketch# 49 "Freezing @ Tracy Arm!"

Happy November!!!   I hope all of you out there in Bloggyland are well, and you are ready to get your "SKETCH on!"  The first sketch for this month @ The Memory Nest Blog is up and ready for you to join in!

Leslie has given us another FUN Challenge this month, with a little added "somethin' somethin'!"

I am sure you are able to replace the "@" sign with any other embellishment, but I thought it would be fun to incorporate it in my layout, and in the title.  Take a look at the sketch:

As a little "aside" for you - I did do a little research and found out that the "@" was originally used when listing and pricing items for example:  Qty (3) Chocolate Bars @ $1.00each = $3.00.
Sometimes it is also used in the place of the word "Approximately" or "Around" as well - ie: We should arrive @ 6:00pm. 
Since the invention of Email - it has become widely used as an email "Address" denoting what email service or provider is used for that person's email address.  - So now you know! LOL!

Now, onto my DT Inspiration Layout for you....


I decided to break into the pack of Disney Cruise Line ALASKA Scrapbook papers/stickers, that I purchased on our Disney Wonder Cruise this past June, along with some other papers from my "STASH!" I love the bright and dark blues that pick up the colors in the glacier, mixed with the black and red check, that picks up on our red rain jackets - I didn't think it would work - but somehow it does!

This is one of my favorite photos of us, standing at the bow of The Disney Wonder, right in front of the Sawyer Glacier, at the end of our trip up Tracy Arm Fjord.  We stood, freezing, in the cold, wet, rainy weather for about 2 hours, holding our "front row spot" as we traveled up the Fjord, approaching the glacier.


We sailed through incredible blue water, and around every bend there were breathtaking views of mountains and amazing waterfalls. As we got closer, there were icebergs and seals floating by too.  It was a trip of a lifetime, and a memory we will cherish always. This view was worth the wait, in the cold, wet, windy weather for sure!


Thanks for stopping by!  I hope you will join us and play along at THE MEMORY NEST BLOG.  I can't wait to see what you will come up with!!

((HUGS)) ~ Sherri

List of Supplies:
Scrapbook Customs: Mr. Lumberjack / Alaskan Cruise
Disney Wonder Alaska 2015 Paper/Sticker pack
Theresa Collins Wanderlust Decorative Brads
My Mind's Eye Jubilee Rub-ons
Basic Grey Alpha Stickers
Glitter Dots / Mickey Eyelet

Monday, October 12, 2015

"MIM" # 48 from The Memory Nest -Taco Festival!

Hello my Scrappy Friends!   It is time for the 2nd Sketch Challenge for October - from The Memory Nest Blog!

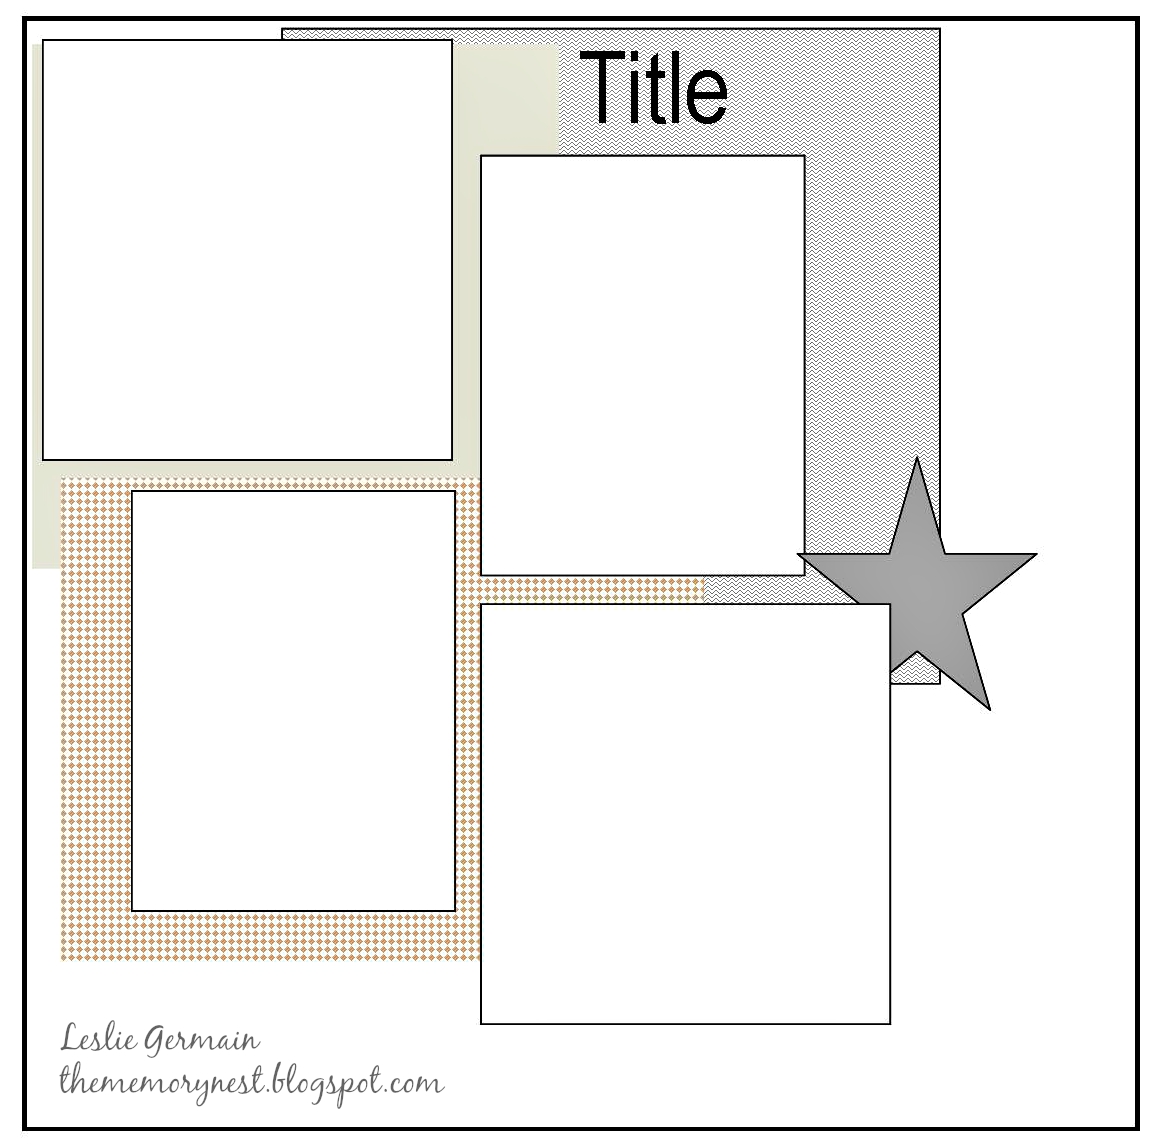
This is a great one!  It challenges you to fit 4 photos on one page - I know you will create something AMAZING!!

I decided to go with some photos from our visit to the First Annual NJ Taco Festival, held at the Sussex County Fair Grounds last month.  While the sunny day turned into a rainy one -and being a "FIRST Time Ever " Event, - they had LOTS of kinks to work out ( 1 hr + waits, poorly organized, slow check in, not enough food trucks/vendors, running out of food...)  I still had a great time - and had some delicious Tacos, Corn and a Margarita too!

So - here is the Sketch for your inspiration - Have lots of FUN creating something FANTASTIC with it!!


And here is my Design Team inspiration layout for you! :


When planning this layout, I could have sworn I had some patterned paper with tacos, or jalapenos on it somewhere in my stash - and thought that would work great.  Well, after searching and searching, I never did find it, BUT instead I found this beautiful Bo Bunny "Hello Sunshine"  Collection, that I had been saving for a "rainy" day!  When I saw all the yellow in it, I thought it would work our perfectly!!


I found this cute green ticket in my stash - and thought it would be a great place to make a list of what we ordered and the name of the Taco Truck we ordered from. The Smoked Brisket, white cheese, onion, cilantro, avocado soft tacos were really AMAZING!!


Let me tell you, the $7.00 Spicy Margarita was REALLY Good - I will have to search Pinterest for a recipe!


The Roasted Mexican Corn with mayo, white cheese, and hot sauce was worth the wait!!  #DELISH!


I've had these pretty resin flowers in my stash 4ever!  I think they worked out well on this layout, and I'm happy I saved them!!


Thanks for stopping by,  I hope I haven't made you too hungry!!  After you fix those tacos for dinner, be sure to come back and play along with us at The Memory Nest Blog!


((HUGS)) ~ Sherri


Items used on this Layout:
Bo Bunny "Hello Sunshine Collection" #12HSL354 -Little Things and Ephemera Pack
Heidi Swap Chipboard Stickers
Prima Sculptured Flowers
My Minds Eye - Market Street Enamel Dots
Ranger Distress Stains: Peacock Feather, Peeled Paint, Ripe Persimmon
Bazzill Cardstock


Monday, September 14, 2015

"MIM" # 47 from The Memory Nest - "ALOHA ~ Oahu!"

Hello my Scrappy Friends!! 

It is time for the second September Challenge from The Memory Nest Blog!

Wait until you see it!! And if you link up your creation - you could WIN a $15.00 Gift Certificate from The Memory Nest!! 

Here is the AWESOME Sketch designed by Leslie!


Here is my Design Team submission for this FUN Challenge!


I've had these photos since our 2012 Disney Cruise to Hawaii, and figured it was time to finally scrap them!!  We Honeymooned in Hawaii back in 1982, and returned there on a 14 night Disney Wonder Cruise, from Los Angeles and back, 30 years later.  We actually celebrated our 30th Anniversary while on-board, in the middle of the Pacific Ocean!! These photos were taken as we were about to pull away from port in Oahu, with the majestic Diamond Head in the background.

I thought the bars on the right of the sketch would look great as banners, so I layered some on top of them too!  I used up a bunch of papers from various paper collections - Graphic 45 Tropical Travelogue, Basic Grey South Pacific "Tahiti" an scraps from my stash. 


I am sure you all know my "problem" with "Blank Space" by now... So you will understand how I could not help myself and added the "Aloha" sticker to the top right of the page - ( Plus, I've had that sticker since 2012 too - it is from the Hawaiian Disney Cruise Scrapbook Kit that I bought while on-board our cruise - so it is about time I used it!!!)

I love distressing my paper edges with Ranger's Distress Stains! - the colors are so rich and vibrant, and stay on the paper, not like some chalks.  They are easy to apply and you can even tap a Q-tip on the applicator, to get the stain into the "nooks and crannies" of your embellishments!

I love to "Fussy Cut" out paper embellishments to add to my layouts.  I usually add then to the page with 3D Foam Dots, to add layers.  that is what I did with these flowers from a page of Basic Grey's South Pacific "Tahiti" paper.

How cute is this little "Polaroid" Camera?   This was made using a Die from Freckled Fawn.  I first cut it out in black - and the cut out some of the "parts" in different colored papers - #FUN  :-)


Thanks for stopping by!  I hope this sketch, my layout and all of the layouts from the rest of The Memory Nest's Design Team, encourage you to PLAY along with us and "Get Scrappy With It!"

((HUGS)) ~ Sherri

Tuesday, September 1, 2015

The Memory Nest's September Challenge with 2 Crafty Girls!

Hi Everyone - This month we are doing something a little different at 
The Memory Nest...

For our FIRST Challenge for the month of September, we are Teaming up with the Design Team over at 2 Crafty Girls!  Please check out all of the Details and Info over at The Memory Nest Blog, and come play along!!!   LOTS of chances to WIN a PRIZE Sponsored by THE MEMORY NEST!

The Challenge is to make a card, using one or all of the 3 "prompts" below, either the Photo Inspiration, the Technique, or the Sketch.   I chose to focus on just the Sketch.

Here is the Official Challenge Info :


Making a card is pretty much out of my comfort zone, as anyone who has followed along with my blog knows.   Maybe because the space seems so small to me, and I usually like to add A LOT of STUFF to my scrappy projects!! LOL!!

Anyway - this challenge came at the perfect time - as I needed a "THANK YOU" card for a co-worker, and I thought -okay, why not!!

So - here is my card - using the Sketch for the Challenge:


I used scrap paper from my stash - I swear, I've had this paper for about 7 years!! ( You never know right?!!)   The "THANK YOU" is a sticker and I cut the ends of the 2 pieces of Washi Tape into a banner shape.  I then outlined the Washi with a white gel pen to make them stand out a little.


I used 2 different scallop punches to punch out the flowers from the patterned paper.  I added the larger center flower with foam dots, to give the card some dimension.  I also added some "DEWDROPS" in the centers of the 3 flowers for a little "BLING" too!

I inked the edges of the flowers with Ranger Distress Stains, and fussy cut 2 leaves out of the flower pattern paper.   I inked those too.  I curled them around my finger a little and only added glue to the base that is tucked under the flowers.

SO - I think I "SURVIVED" this Card Challenge - and - I just might be Inspired to make more cards.... we will see, won't we?! LOL!

Thanks for stopping by and I really hope you will play along with us at THE MEMORY NEST BLOG, and check out all the Crafty Inspiration over at 2 Crafty Girls too!!

((HUGS)) ~ Sherri

Monday, August 10, 2015

The Memory Nest "MIM" #46 "Disney Crusin' "

Happy MONDAY everyone!   It is time for The Memory Nest's 2nd Sketch Challenge of August!

Leslie has given us another really COOL Sketch to work with this month!
For FULL Challenge DETAILS and PRIZE info - please visit THE MEMORY NEST BLOG!


HOW FUN RIGHT?!!!


When I saw the circles - I remembered a had some "White Simple Circles" by Jillybean Soup left from a diecut sheet I had previously used, and after searching through (piles of) photos to scrap - I pick this one, of "my guys" on our Disney Fantasy Cruise from January 2014.   I then knew I wanted to use this really cool base paper from Reminisce, and a brand new piece of 12x12 from Scrap Your Trip - "Magic Cruise"  Then, realizing that the base paper I selected was a little thin, and would need some re-enforcement, I trimmed it a bit, and glued it to a piece 
of "White Corrugated Sheet" by Fancy Pants Design.
I painted the anchor, and went around the edges with a Black Sharpie marker.


I decided to make a pocket out of the photo and mat.  I used 2 sided foam tape along the sides and the bottom, leaving the top open.  This allowed me to journal on a tag I cut out using a Tim Holtz die, and slip it in the pocket.  I wrote a little about out trip on it - and embellished it with paper, and a little life preserver Mickey head that I fussy cut out, and added with a pop dot to the tag.
I used a circle punch to cut out the cute little Mickey heads and DCL Logos from the Scrap Your Trip paper. I inked their edges, and then added them to the inside of the circle grid, using foam dots.
After cutting all the "flags" for the banner - I realized that the Red Polka Dot letters that I wanted to use, would not work on all of the banners/flags in my "DISNEY" Title - so I used black letters on the flags that were red.  I also forgot to ink the flags/banners, before punching holes in their tops, stringing them with the bakers twine, and then adding them to my layout with foam 3D dots.   To "fix" this, I carefully went around the edges with a fine tip black Sharpie marker.
 ____________________________
Here are the Products used:
Reminisce - Cruise
Scrap Your Trip - Magic Cruise
Jillibean Soup - White Simple Circles
Fancy Pants Designs - White Corrugated Sheet
Splash of Color - Magic Cruise Collection - At Sea
Moxie - Magical Moments - Miss Mouse
Tim Holtz - Tag Die
Amy Tangerine - Thickers "Daily"
Black Sharpie Marker
Ranger Distress Stains: Brushed Pewter / Picket Fence / Blueprint Sketch
Ranger Distress Paint: Brushed Pewter
Bakers Twine

Thanks for stopping by!  Please be sure to check out the PRIZE Info, and Challenge Rules/Details over at The Memory Nest Blog!!   I hope to see you playing along with us soon!1

((HUGS)) ~ Sherri

Monday, August 3, 2015

The Memory Nest "MIM" #45 Hard Rock Fun!

It is time for another SKETCH Challenge over at 
The Memory Nest Blog!!

Crystal created a SUPER FUN Sketch for you 
to play along with!!  Take a look!

I started looking through my photos and found 2 from way back in 2008!!  I can't believe they were taken 7 years ago!!!  I've always loved the textured look of the "waves" in these shots and really wanted to FINALLY use these photos!  I liked the concept of the sketch - having one bigger center photo, with 2 smaller ones on the sides.  I wasn't sure if I could make the sketch work with just 2 photos - but I think I was able to pull it off by using a journaling card, washi tape and layered puffy stickers for the smaller one on the right - what do you think?

This photo was taken of my husband, my oldest son and me while visiting Hard Rock Park in Myrtle Beach, SC.  (My youngest son didn't want to be in the picture - I guess he thought he was too cool - but, looking at this picture - I think WE are the "COOL" ones! LOL!)

This was in August of 2008.  The Park was brand new. It had just opened in April of that year.  It had different sections with different music in each. 

There was a great 150 ft tall rollercoaster that blasted Led Zepplin music, another ride was a little British Mini car-coaster that played hits of the 1980s.  "Life in the Fast Lane" was a mine train roller coaster that played the Eagles song while riding it. Slippery When Wet was a suspended roller coaster in the "Born in the USA" section. Nights in White Satin was a ride in the dark - Seriously a FUN Park - we were so sad that it closed in September of that same year!!  We are so lucky we got to spend a very fun / but HOT day there!


I double matted my base page with a piece of orange pattern paper, and solid aqua cardstock. I then tore a strip of orange and aqua print paper and added it along the bottom. I sprayed the base papers with Glimmer Mist, to mimic the splatters on the sketch.

The large photo was purchased from the Park.  The smaller one was take by my son Jake.  I love using the same or similar photos in the same layout. - and I LOVE that Washi tape - don't you?

Here you can see the layered puffy stickers and part of the "HOT"  flying guitar sticker embellie - I just had to add it!

Thanks for stopping by!  I hope you jump right in and give this sketch a try!  I can't wait to see what you will do with it!
Visit THE MEMORY NEST BLOG for more Inspiration, Contest Rules, Deadlines and PRIZE INFO TOO!!

((HUGS)) ~ Sherri

Here are the items used:


Little Yellow Bicycle - Fun in the Sun / South Beach Papers
Little Yellow Bicycle - Boardwalk Puffy Stickers and Journaling Tablet
Jolee's "Rock Star" - Guitar embellishment
Washi Tape
CTMH "Footloose" Patterned Paper
Brads
Custom Die Cut Title from Scrap-a-Doodle Doo
Ranger Distress Stains
Glimmer Mist


Monday, July 13, 2015

The Memory Nest's "MIM" #44 Fishing in Alaska with Disney!

It's already time for the 2nd Challenge of the July from The Memory Nest Blog!

I think the "Make it Monday" (MIM) Sketch #44 BELOW is just perfect for some FISHING photos from our recent Disney Cruise to Alaska!!


I sorted through my (ever growing / never ending) "Stash" of Disney papers, etc... to see what would go well with the Alaska papers I recently purchased in anticipation of our trip.   I am sooo pleased that the Capt of the little fishing boat took the photo of my Dad, Hubby and 2 sons with our cruise ship, The Disney Wonder in the background!!  The White, Blue and Yellow of the ship, along with the Red rain jackets that my guys were wearing helped to make the photos work well with the papers I selected - don't 'cha think?  Take a look at my take on the sketch:


While I LOVE the "squareness" of the sketch and I think it works GREAT for these 3 photos - I have to say, it challenged me a quite a bit.   I had all the elements on my desk for a few days, not sure about gluing it down, but as the deadline fast approached - I had to move it along!!   For those of you that know my usual "dimensional/multi-layer/" style - ( aka - "just put EVERTHING on the page" style ) - I was finding it hard to make it "work" in my mind's eye.

Finally, I added the finishing touches that made it all come together for me - the MICKEY Hand Washi Tape, the little photo of their fishing boat, in the yellow striped chipboard frame, and the little embellies underneath it. 

My youngest son Jake, caught a 23 lb King Salmon!! WOO HOO!!

They all had a GREAT time and will remember that day forever!

My oldest son Nick caught a Rock Fish ( he named him Chris Rock!) We had him shipped home too, and are looking forward to a "Fish Taco" dinner one night soon!!

I created a journaling tag, and made a pocket behind the group photo, to record memories about that day.  It is one of my favorite ways to include journaling in my layouts.

Thanks for stopping by!  I hope you will play along with us over at The Memory Nest Blog!  This is really such a versatile layout.  Come hop on over to get all the details, check out this month's prize a $20.00 Gift Certificate, and find all about your MANY chances to WIN!!


Items used:
Scrapbook Customs - Alaska Cruise and Ketchikan Papers
Queen and Co. Magic Film - Stars
Left over pieces of 3 Disney papers with no name on them (for background squares!)
Powder Puff - Blue Moon Chalk Ink
Queen and Co Embellishment Buttons
Scrapbook Customs Self Adhesive Doo-Dads - Alaska Vintage
Tim Holtz - Tiny Attacher
Washi Tape
Queen and Co. Headliners (Title)
Queen and Co. Ice Accents/Candy Shop (Star)
Simple Stories Say Cheese2 (Chipboard Frame)

((HUGS)) ~ Sherri

P.S. - I LOVE comments, and would LOVE to hear from you! If you have a minute, please feel free to let me know you were here! :-)