Pages

Showing posts with label 2 photo layout. Show all posts

Sunday, April 7, 2019

Challenge YOUrself Blog Challenge #64 “Thanksgiving”

This month’s Challenge at the Challenge YOUrself Blog is  all about your favorite holiday! Just create a Layout about your favorite holiday and make sure to include YOU in one of the photos!  I hope you have a chance to play along with us this month!
My favorite holiday is Thanksgiving- because it’s all about Family and Traditions- 2 very important things in my life! If there is a small gathering of 5, or a houseful of 16 or more
- it’s always a special day and a chance to make lasting memories 
and carry on time honored traditions.
Here is my layout for your inspiration along with some close-ups too!


Thanks so much for stopping by - I hope I've inspired you to play along with us at the Challenge YOUrself Blog this month - and I can't wait to find out about your favorite holiday!

((HUGS)) ~ Sherri

Items Used:
BoBunny - Farmer's Market -Harvest & Thankful & Farmer's Market
Moxxie - Fall Harvest - Perfect Peck and Wind Blown
Ranger Distress Stains - Fired Brick, Tarnished Brass, Peeled Paint, Rusty Hinge
Twine - Sequins- Antique Doily - Wooden Heart, and Title

Friday, September 21, 2018

I'm a New Design Team Member for the My Little Scrapbook Store!!!

Hello Scrappy Friends!  I am excited to announce that I have been asked to join the Design Team for My Little Scrapbook Store!    Please check out their great website full of awesome Scrappy Goodness!!  You can also join us for some inspiration on their Facebook Page Scrapbooking Layouts and More!

I really love a challenge and the Stargazer Collection from Kaisercraft was really not my usual style.  When Michelle at My Little Scrapbook Store asked me to play around with it - 
I thought - Why not! 

The colors are Blues, Silver, Grey and White.  I thought they would work great with Black and White photos!  Here is my Layout for your inspiration.  ( I'll list the items used a the bottom of this post - Plus a LINK where you can get your Happy Scrappy Bag too! )

I LOVE how this layout came out!  These photos were taken last September, at the Pocono Lantern Festival, Pocono Raceway, when my friends and I our first Lantern Fest!  It was a great day and an amazing release! We have to do this again for sure!

Here are some close ups for you:
I love to layer patterns, and tearing edges adds an added texture to the layout. I like to ink my edges with Ranger Distress Stains.  I double matted the photos,
and added them with 3D Foam Tape.
I've had this grey flower and crystal sprig of flowers forever! I love how they look on this layout!!

One of my favorite things to do is to create a little "pocket" behind one of the photos, using 3D Foam tape. I then tuck a decorative tag with some kind of pull tag in, and include journaling on the back  - here is the front and back of the tag for this layout.


Thanks so much for stopping by - if it was your first time here, WELCOME! 
 I hope you'll stop by again, if you've been here before - THANKS for coming back!
I hope I've inspired you to "GET SCRAPPY" with it - and check out all the goodies over at the My Little Scrapbook Store too!

Feel free to leave a comment below! I'd love to hear from you!
((HUGS)) ~ Sherri

Items Used:

Kaisercraft - Stargazer Collection  <<-- font="" get="" here="" kit="" your="">
  Starry Night
  Moonlight
  Galaxy
  Sticker Sheet
  Die Cut Shapes
Forever in Time - Bling (Camera)
Petaloo - Pennylane Forget-me-nots
Prima Flowers - Crystal Palace and Sunrise Sunset Collection
Ranger Distress Stains - Blueprint Sketch, Black Soot, Picket Fence, Brushed Pewter
Nuvo Crystal Drops - Simply White, Midnight Blue, Liquid Mercury

Saturday, September 19, 2015

SOS 2nd Sept Challenge - Sketch and 3 School items "Date Night"

In the spirit of "September" being a "Back to School" month - This month's Sketch Challenge at Scrap Our Stash has a little "extra assignment" for you.  Not only do you have a GREAT Sketch to work with - we've added the requirement that you have to "ADD 3 School Items."

Here is the SKETCH  - so put your THINKING CAPS on - as we'd love for you to play along with us!


I've been wanting to use these photos of my husband and I, from a "Date Night" we enjoyed back on September 8th, 2013!!  We went out to dinner and then to a club with a bunch of his friends from work.

Here is my DT Inspiration Layout for you....


I LOVE this paper line from Paper House - Color Ways: Sapphire Collection!!
Blue is one of my favorite colors and I thought it went great with my 2 photos 
from our "Night on the Town!"  

You can see all of the school supply items I used for the challenge in this photo.
They are:
(1) Staples - I used my big EK Success Fastenater Stapler with white and black polka dot staples
(2) Graph Paper for the journaling tag
(3) Black Paper Clip
and an extra (4) Note book edge punch

Here are a few more close ups for you:

One of my favorite necklaces broke, and I couldn't part with it, so I put the beads in my scrappy stash and pulled a few out for this layout.  You can see one of them here - I affixed it to the corner of the photo with an enameled brad.  I love the Silver letters - and decided to make the title "#NEVER2OLD2 Party" since we were the "oldest" couple in the group that night!!
Here is the rest of the title  and another bead from my broken necklace, along with some silver star washi tape and some more "bling!"


We really had a great night! Lots of laughs, good food, a train ride with more laughs on the way home  - and even if we were the oldest ones in the group - I don't think we look that bad for a couple married 31 years!

This is the tag (made with graph patterned paper,) that was tucked behind the photo on the right.  I added the photo with 3D Foam Tape on the bottom and sides, so I could slip the journaling tag behind it.


Thanks for stopping by!  I hope you will play along with us at the SCRAP OUR STASH BLOG!!

((HUGS)) ~ Sherri

Monday, May 11, 2015

"I Am" Simple Stories Kits are still available!

Hi everyone - I wanted to share a 2 page layout I created and designed for my last class at Scrap-a-Doodle Doo, my local scrapbook store in Ramsey, NJ.  

I used the beautiful New Simple Stories "I Am" Collection, along with Black Gesso, a Stencil, and Glimmer Mist.  There are a few Kits to Go left at the store if you are interested.  

Contact them at 201-818-7060 AND- CHECK OUT their BRAND NEW / UPDATED / BEAUTIFUL Website at www.shopthdoo.com - Get yours before they are all gone!

Here is the layout, and a few close ups too!


The kits come with complete instructions that include color photos, and cutting guides too!
Thanks for stopping by!  Be sure to stop at www.shopthedoo.com too!
((HUGS)) ~ Sherri

Monday, April 6, 2015

The Memory Nest Make it Monday # 37 - Beer Here!

I can't believe April is already here!!  I don't know about you, but this year is just flying by!

I  had a chance to go away for a friend's birthday crop weekend this past month, and was able to get some layouts done.   One of them is for this month's first Make it Monday Sketch ( #37 ) over at The Memory Nest Blog.   ** If you play along with us, you could win a  Gift Certificate to The Memory Nest!  What are you waiting for?? - this Sketch is LOTS of FUN!

Here is the Sketch ( #37) - see what I mean!


and here is my "take" on it for your inspiration:

Speaking of "time flying by" these are 2 more photos from our September Trans-Atlantic Cruise on The Disney Magic, which was 6 month ago!!!   We enjoyed many laughs at many tastings on that 14 night cruise!  This is a photo of me and my oldest son Nick, at the Beer Tasting we had signed up for on one of the days we were at sea, somewhere in the middle of the Atlantic Ocean! ( along with a pic of the different beers that we got to "taste!")

 Here are a few close ups - and a "behind the scenes" photo -
After laying down the 3 strips of textured/patterned papers, I decided to play with some India Ink that I had in my stash, and dropped it randomly over the layout.   This is before it dried - and some of the drops are still wet.  
 

I added lots of embellies to this layout - ( surprise, surprise right?) - and used up some of the papers I had in my "stash" - which is always a good feeling!  (But then again  - it is a little sad, because I used them, and can't use them again..... Do you know what I mean?)  That little shiny gold Mickey head is actually some of the confetti that was sprinkled on our table one night on our last trip to WDW - and YES, I scooped it all up and put it in my purse - and keep it in a little baggie to add to layouts from time to time.  I'm getting a little low.... so do you think that I can use that as an excuse to head back to Walt Disney World??

I just had to give you a close up 
of this really cool textured paper (above)
that I have had in my stash for many years 
When I saw it i thought it looked like Beer - what do you think?

I'm LOVING the new Gold Letter Stickers from American Crafts - and used them to create "BEER" in the title.  I used different color stickers to create the word "tasting"  - they are from a Simple Stories "Destination" Sticker sheet.  I also outlined all of the letters with a fine point black Sharpie marker - to make them "pop." 

As a last minute thought, I decided to use some paper yarn, and twirl and loop it throughout the layout -  I think it helped to "tie" it all together. LOL!

Well, as you can see in my finished layout, I added "a bit" more "stuff" to the layout than what the sketch calls for, but that's what Sketch Challenges are all about.  Using the Sketch as your guide or inspiration, and then making it "your own!"


Here are the items that I used:

Simple Stories "Destination" Collection
  #1309 Flash Cards
  #1303 Cardstock Stickers
Simple Stories "Life Documented" Collection
  #1104 For the Record
Making Memories Panorama Suitcase Label Stickers
DIY Shop / American Crafts - Gold Letter Stickers
Gold Stars Washi Tape
The Paper Company:
  Burnt Umber Corrugated paper
  Sand Rain Drops paper
Kaisercraft - Close up Collection
  #P1678 Film
Kaisercraft - Mr. Fox Collection
   Collectables
Ranger Distress Stains:
   Black Stoot
   Tarnished Brass
   Peeled Paint
Quick Quotes - Chalk Inks
Gold Sequins, Gems and Black Enamel Mickey Head Stickers
Paper Twine/Yarn
India Inks


As always, THANK YOU so much for stopping by.  I hope this layout inspires you to play along with us - or at least to "get your scrap on!"  Life is too short not to play with paper and create something that makes us smile!

Have an A W E S O M E   April!! Thanks for stopping by!
((HUGS)) ~ Sherri


Saturday, March 7, 2015

Challenge YOUrself # 16 - My Bucket List

It is time for The Challenge YOUrself Blog's March Challenge!!  This month we want to learn more about YOU 
and what your "DREAMS" are !

Here is the Challenge:
Challenge YOUrself #16:  Your Bucket List 
"What are some of the things you want to do in your life? Have you recently achieved something on your bucket list?  Tell us about it."
~*~*~*~*~*~*~*~*~*~*~*~
  
OH BOY - I really had to dig deep for this challenge - as I feel that I have been very blessed in my life, and have be so very lucky to have been able to do and see so many things.  
At first, I was finding it hard to come up with a list but once I started, the "dreams" kept coming! (Although it seems that most of my bucket list items have to do with travel.   I guess that is because it is something we love to do together as a family, and that is what makes our adventures so special.)

First I selected a silly selfie that I took of myself at a friend's wedding. I printed in Black and White - ( Quite by accident by the way - I don't know why it came out of my printer that way - I guess I need to refill my colored inks! - but I ended up actually liking it better!)  I also decided to add a smaller version of the same photo, that I printed on my little ZINK sticker printer, using a red filter.


Next it was time to decide what papers to use.  I had recently won a contest at Scrapbook.com, and was able to select $100 in product!  I was able to get most of BoBunny's Star-Crossed line, and decided to use LOTS of it for this layout!

Check it out-


I love all the goodies, but I think the film strip is my favorite - isn't it cool?!! I also pulled out an old piece of textured red paper that I've had in my stash "forever!" as I think went perfectly as a base with the Star-Crossed line.  I cut around the hexagon shapes on the edges of the honeycomb paper that I put on top of it, so it would peek through here and there.
**TIP - I  cut out a 10 x 10" square from the middle of that red paper - and only used the 1" frame, so that I still have a piece to use again in the future!  (I recently learned that this "Technique" is called "Gutting" your paper - who knew??!!) 


Here is my "BUCKET LIST"  Like I said, most of it has to do with travel.  What's on your Bucket List?


 I used Viva Decor's Maya Gold "Gold" Craft Paint - to paint the 2 Dusty Attic Chipboard Swirls, along with the torn piece of corrugated cardboard and the edges of the red feather. I 3D Pop Dotted the feathers. I even snuck in some black and white checked Washi Tape too!  I LOVE all the textures and layers.


I also used the Maya Gold paint on the edges of the center black and white photo, as well as the torn layers of patterned papers too. I like to fussy cut elements out of patterned papers to add as embellishments to my layouts too.  
OH - and while writing this post, and listing the items used, I learned that the film strip has an adhesive on the back of it! - I didn't know that when creating the layout, and decided to use my Tim Holtz Tiny Attacher to secure it to the page ( You can see it in the bottom left of the photo above.) -now I'll have to play with it again and see how that adhesive works! LOL!


I used the back of my paint brush to add a few dots of the Maya Gold paint "here and there" on the layout.  I used Ranger Distress Stains in Black Stoot and Tarnished Brass on some of the edges too. I used a black Sharpie marker to outline the title and some of the elements/embellishments on the page to make them "POP."   The gold title and arrow are from the Dear Lizzy Thickers "Royal" foil letter stickers pack (LOVE THEM!) The "53" wooden bingo calendar numbers are from Maya Road. (and yes, that is my age - but as you can see - I don't always act it! LOL!)

Here are the Bo Bunny Star-Crossed items that I used:
12 x 12 Collection Pack
Ephemera Pack
Sticker Stamps
Adhesive Film Sticker
Layered Chipboard
Buttons
Noteworthy Journaling Cards

As ALWAYS, thank you for stopping by my Blog.  I really hope you will play along with us at The Challenge YOUrself Blog, and I can't wait to see what is on YOUr Bucket List!

((HUGS)) ~ Sherri

Wednesday, November 12, 2014

Falling into Fall - SBC November Mood Board + a Sketch Challenge

Fall is one of my favorite times of the year.  I am sure it has to do with all of the warm and wonderful colors, that change all around us each and every day.

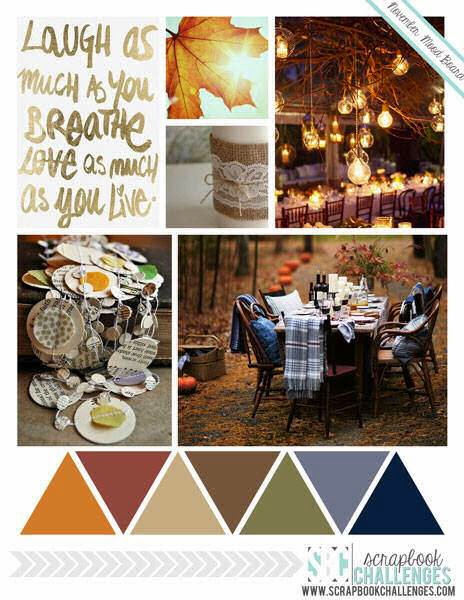
This month's Mood Board Challenge over at Scrapbook Challenges Blog includes lots of those colors, plus some beautiful inspiration, with a little "Golden Goodness" thrown in. ( Who doesn't like a little BLING!?) 


I also decided to make this even more interesting by making this a DOUBLE Challenge for me, and will also be playing along with the folks at The Memory Nest, - using their Make it Monday Sketch Guide #28:


I've had these 2 photos of our now 3 year old Portuguese Water Dog, Maggie ( aka Reel Life Princess Magdalena of the Sea) since last November and thought that they would be great to use in this "combined" challenge.  Maggie had just been to the groomer for her new hair cut. This is called a "Lion Cut" with a shaved backside and nose.  These dogs have webbed feet and use to help fisherman with nets, retrieval and even messages from boat to boat back in Portugal. Leaving her hair longer around the chest helps to keep their vital organs warm, and their shaved hindquarters help with swimming. At one time, there were less than 100 of them left in the world.  They are very smart, hardworking (aka -always "busy") and extremely loving and loyal.  Isn't she a BEAUTY!


Once again, I was able to "Scrap My Stash" with LOTS of goodies that I've purchased from my Local Scrapbook Store, SCRAP-A-DOODLE DOO.   (MAJOR Website upgrade is in progress -watch for their "re-opening" soon!)

I LOVE this honeycomb base paper, and have been holding onto it for quite sometime.  I've hesitated using it in the past because I like it so much and didn't want it to be "gone." - Do any of you do that?  Like a paper so much that you don't want to use it?  Is that wrong??  ( I think not! ) That is why I always buy 2 pieces of papers that I LOVE - ( yea, yea - I've got 2 of about everything - fess up - you probably do too!!)

Well, I am glad I saved it, because it think it works great with this sketch and mood challenge!  I used Vintage Photo Distress Ink, applied with a foam applicator around the edges to give the base page a little depth. - I haven't done that in a while -and I had a blast!


Below you can see where I decided to make a pocket, using foam dots, behind the photo of Maggie's new hair cut and stuck a tag in there for journaling.  ( By the way, did you know that Portuguese Water Dogs have hair, not fur?  They are non-shedding, and need to be brushed, groomed / cut regularly, as their hair keeps growing!)


I cut the 2 little Tickets from a sheet of Prima paper with lots of little paper embellishments, that I think I got from my friend who was "de-stashing" - yea, I know - who does that???!!!  (NOT ME!)

Anyway....  I thought they were PERFECT, so I cut them out and popped them with foam dots near Maggie's pictures.  The tickets say "These are some of my most favorite memories with you" and "Best Friends Forever" ~ Because they are - and we will always be.... Love my Maggie Girl!


I used a piece of burlap along the bottom of the patterned papers (that were also Distressed with Vintage Photo Ink) under the photos, and then began to "build" my pile of leaves and sticks.

I have to tell you,  I LOVE this Tim Holtz Die  - Autumn Gatherings! When it came out, I had to have it!!  I think I've only gotten the chance to use it one other time, BUT after cutting 4 different colored papers with it for this layout, and then inking the leaves and sticks with different Distress Inks with a foam applicator, to try to make them look "real" (and I am lovin' how they came out!) I know I will be using it more often!

I added a few leaves and acorns by the tickets too, to join everything together, then scattered a few gold sequins around to "Bling it up" a little!  - If you have seen my previous layouts, you would know that I am not one for leaving very much blank space, so this sketch was really a challenge for me!

I knew my bright gold letters from Momenta would make a great "Fall" title, and had them in mind when planning out the layout in my head.  The little strips of journaling at the bottom were also cut and then inked, from the sheet that had the tickets on it.  I journaled on them with a gold pen "#morningswithmaggie" and "#loveher"


You can see more photos of Maggie on Instagram if you search those Hashtags.  Oh - and if you think Maggie is cute - you should see her little "brother" Tino too!  You can follow me on Instagram "Shercara" or search for #morningswithmaggieandtino to see more of their photos and even their antics on video too!

Thanks for stopping by!  Hope you join in on one of these challenges - or be daring and try them both too!!  ;-)

((HUGS)) ~ Sherri

Products used :
Momenta Gold letters
Tim Holtz Autumn Gatherings Die
Distress Inks - Colors: Mustard Seed, Spiced Marmalade, Vintage Photo, Crushed Olive, Aged Mahogany
Distress Stain - Tarnished Brass
My Mind's Eye - Lost and Found - "Oliver" Yellow Honey Paper
Prima Marketing - Songbird Collection from 2012 -"Title-it"
PinkPaislee - Prairie Hill - "Kit Strings"
PinkPaislee - Prairie Hill - "Spools"
Simple Stories, The Story of Us -SNAP Collection, Die Cut Cards Paper Yarn/Twine
Burlap
Sequins
3D Foam Dots


Monday, November 10, 2014

Summer Memories Sketch #419 Scrapbook Challenges Blog

It has been very chilly here in NJ, so it must mean winter is really on the way!  

I decided to ignore that fact for a little while longer and use some summer photos for my DT Layout for
SCRAPBOOK CHALLENGES.

First here is the VERY FUN Sketch #419


Why do I say it is "FUN" - well, if you don't know by now, I LOVE mixing up patterns and textures, and this sketch is perfect for it and allowed me to do it -in a very big way- as you can see in my layout below, using photos from our 2013 vacation to North Topsail Beach, NC


One of the things I love about doing sketches is that I try to use up the "STUFF" I have in my stash, and this sketch is FULL of all kinds of "STUFF!" 

I used paper, stickers and chipboard from the Creative Imaginations Tidepools Collection by Christine Adolph - that I bought at my Local Scrapbook Store  SCRAP-A-DOODLE DOO, (quite a few years ago I'm thinking!)  I added some netting, paper yarn for the banners, seashells and even some Beach Glass Mud Puddles under the shells on the bottom left of the page.

On this close up, you can also see how I decided to make my banners out of circles that I folded over, and stapled to some paper yarn, and created a sparkly layer behind the first layer of circles to make them "pop!"  ( I think they kind of make the banner look like mermaid scales -well sort of - kind of...??)

More sparkly fun was had with a little misting!  Notice the Trunk Bay Glimmer Mist that I sprayed on the manila title and the tag I used for journaling?  I also gave the base page a few sprays before adding the photos and embellishments too!

Oh, speaking of the tag, I actually created a "Pocket" for it, by leaving the top of the bottom left base patterned paper open, so I could slide the tag in it.  This is a cool way of hiding journaling in a layout.  It doesn't take away from the layout design, and hides your handwriting if you don't really like it. It also allows you to write on the front and back - so you can save your thoughts and memories of the time / photos used in your layout!

Thanks for stopping by!  Be sure to check out ALL the Design Team Submissions over at the SCRAPBOOK CHALLENGES BLOG, and I hope you will play along with us this month!

((HUGS)) ~ Sherri


Monday, November 3, 2014

Starbucks!

STARBUCKS!!

What more do I have to say??? 

You either LOVE it - or you don't - 
and if you LOVE it - you'll get what I mean when I say

STARBUCKS!!

I - as you can tell, I LOVE IT!!

This is a layout I made from our visit to Old San Juan, Puerto Rico, this past September, at the end of our 14 night Disney Westbound TransAtlantic Cruise.  We spent 2 days there, and visited STARBUCKS on each one of them!
Good thing it was just around the corner from our hotel! :-)


I used the city map I had saved of Old San Juan, and have an arrow pointing to the location of the STARBUCKS!

The overlay, which includes the 2 green frames, the "famous" Logo, coffee beans and the shape of the cup, were made and purchased from Mary at http://www.originaloverlays.com/

The cup was originally solid green like the rest of the overlay, but I "jazzed" it up a little with some white and black cardstock, along with the logo part of the cardboard cup wrapper, and one of the green sticks that keep your drink warm and from spilling, that I got from STARBUCKS!  I pop-dotted just the cup portion of the diecut too.

I accidentally printed 2 of the photos on the bottom left, so I fussy cut myself out of one of them, and then pop-dotted "me" on top of the photo in the mat.

Thanks for stopping by - I hope you get in some scrappy time this week!

((HUGS))
~Sherri

Monday, June 16, 2014

SBC -Sketch # 398 - "MY DOG"

Hello my Scrappy Peeps!

Here is Scrapbook Challenges Blog's Sketch #398.  Cool one huh??!! :-)  I couldn't wait to use it!

 As you may know - SBC Blog also adds more fun for your inspiration - by added "OPTIONAL" challenges too!  I chose to ALSO incorporate the "FULL HOUSE" Challenge into my layout!


I decided to use 2 pictures from Instagram - of 2 of my favorite subjects - my youngest son Jake, and our new puppy Valentino!  I also have been on a Black, White and Teal, "binge"  - as I think the colors go so well together!  Here is my layout - what do you think??


I had so much FUN using up paper scraps and embellishments from my "stash!"  I am so happy with how this layout came out - it makes me SMILE! -

(Behind the Scenes Note:  I really found the thought of drawing those lines around the layout a "challenge" BUT let me tell you - once I got started - I had to stop my self and say - "That's enough!"  I REALLY like how they add to the layout and bring it all together - This is definitely a "RE-DO" for me on a future layout!)

For the FULL HOUSE Challenge  - 
I used (2) Different ALPHA's  - the black and white "My," and the chipboard "DOG"

I used - (2) Colors of Paint -(1) "Trunk Bay" Glimmer Mist - on the white back ground/base cardstock, and also on top of the "DOG" chipboard - after I painted it with Ranger's "Pool" Paint Dabber, and (2)  Black -which was drops and splatters of of India Ink - FUN!


Here is a close up of the Chipboard "DOG" - I also outlined it with a Black Sharpie marker.


I used (2) Wooden Elements from QUEEN & Co. - that I purchased - along with all the rest of the items for this Layout, at my FAVORITE Local and On-Line Scrapbook Store - Scrap-a-Doodle Doo!  You can see them in the close up photo below  - along with some of the (5) BUTTONS - from my stash, and my sweet Tino's face!)


(5) pieces of Washi Tape was the last item in the FULL House Challenge - I had fun using it to cover up some items in the photo that took away from the color scheme of the layout -


That's my take on #398 - I hope it inspires you to get Scrappy With It!   Check out all the other DT Member's Layouts over on the SCRAPBOOK CHALLENGES BLOG - We hope you will play along with us!
((HUGS))
~ Sherri