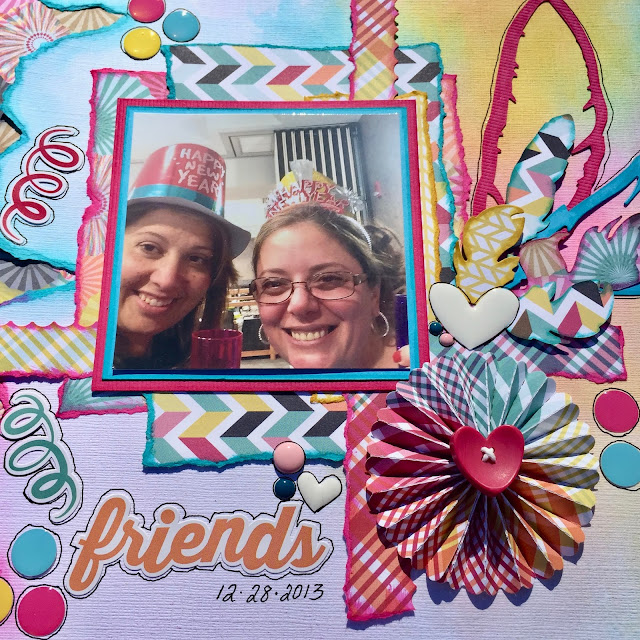
Talk about a challenge!! When I first saw this one - I thought - OH BOY, I'm in trouble - Negative Space? Really? Me? "She who needs to step away from the layout" as my friends say - before I put 5 pounds of embellishments on it!! ?? YIKES!!
But, since I "love me a good challenge" - I stepped right up to the plate, uh, I mean scrap desk, and decided to just "GO FOR IT!"
You can find out all of the challenge details, and PRIZE info at the Challenge YOUrself Blog - but basically - you need to be in a photo on your layout, and this month - use "negative space!"
Here is my Inspiration Layout for you! I have to say - I LOVE LOVE LOVE how it came out!! - ( if you continue to the end of this blog post - I'll show you how I made that torn background!)
First - I took the 3 colors of Ranger Distress Stain that I wanted to use, and "pounced" or dabbed them here and there on a
Ranger Inkssentials Craft Sheet. I then spritzed them with a little water from a spray bottle.
 |
| Below you can see a close up of the Stain and the Water on the matt. |
 |
| I then took the torn paper - and placed it textured side down, on top of the stains on my matt, and pressed gently. I held it up so that there would be a bit of "drippage" from the top to the bottom. |
 |
| Here is a close up of all of the colors - cool huh?!! |
I inked all of the torn edges with the stains, and spritzed them with a bit of water to spread the color around - I have to say, I LOVE how this came out, and will be trying it again for sure.
Thanks for stopping by! I hope I've inspired you to play along and get a little "inky" with it too! I hope to see your creation on the MARCH NEGATIVE SPACES Challenge over at the Challenge YOUrself Blog! You could WIN a PRIZE!!
((HUGS)) ~ Sherri
Items Used:Photo Play - "Fun with Friends" Collection
Element Stickers
4x6 Cards
Confetti
Rosettes
Tim Holtz Feather Die
Tim Holtz Rosette Die
Ranger Distress Stains - Peacock Feathers, Fossilized Amber, Picked Raspberries
Cardstock
Recollections Enamel Dot Stickers
My Mind's Eye Enamel Dot Stickers
Confetti
Rosettes
Tim Holtz Feather Die
Tim Holtz Rosette Die
Ranger Distress Stains - Peacock Feathers, Fossilized Amber, Picked Raspberries
Cardstock
Recollections Enamel Dot Stickers
My Mind's Eye Enamel Dot Stickers


