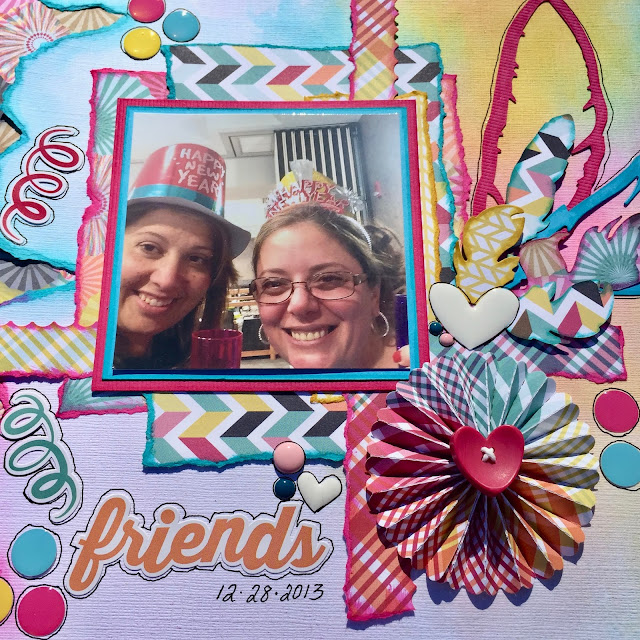
Talk about a challenge!! When I first saw this one - I thought - OH BOY, I'm in trouble - Negative Space? Really? Me? "She who needs to step away from the layout" as my friends say - before I put 5 pounds of embellishments on it!! ?? YIKES!!
But, since I "love me a good challenge" - I stepped right up to the plate, uh, I mean scrap desk, and decided to just "GO FOR IT!"
You can find out all of the challenge details, and PRIZE info at the Challenge YOUrself Blog - but basically - you need to be in a photo on your layout, and this month - use "negative space!"
Here is my Inspiration Layout for you! I have to say - I LOVE LOVE LOVE how it came out!! - ( if you continue to the end of this blog post - I'll show you how I made that torn background!)
First - I took the 3 colors of Ranger Distress Stain that I wanted to use, and "pounced" or dabbed them here and there on a
Ranger Inkssentials Craft Sheet. I then spritzed them with a little water from a spray bottle.
 |
| Below you can see a close up of the Stain and the Water on the matt. |
 |
| I then took the torn paper - and placed it textured side down, on top of the stains on my matt, and pressed gently. I held it up so that there would be a bit of "drippage" from the top to the bottom. |
 |
| Here is a close up of all of the colors - cool huh?!! |
I inked all of the torn edges with the stains, and spritzed them with a bit of water to spread the color around - I have to say, I LOVE how this came out, and will be trying it again for sure.
Thanks for stopping by! I hope I've inspired you to play along and get a little "inky" with it too! I hope to see your creation on the MARCH NEGATIVE SPACES Challenge over at the Challenge YOUrself Blog! You could WIN a PRIZE!!
((HUGS)) ~ Sherri
Items Used:Photo Play - "Fun with Friends" Collection
Element Stickers
4x6 Cards
Confetti
Rosettes
Tim Holtz Feather Die
Tim Holtz Rosette Die
Ranger Distress Stains - Peacock Feathers, Fossilized Amber, Picked Raspberries
Cardstock
Recollections Enamel Dot Stickers
My Mind's Eye Enamel Dot Stickers
Confetti
Rosettes
Tim Holtz Feather Die
Tim Holtz Rosette Die
Ranger Distress Stains - Peacock Feathers, Fossilized Amber, Picked Raspberries
Cardstock
Recollections Enamel Dot Stickers
My Mind's Eye Enamel Dot Stickers


WOW!! Gorgeous!! Love the colors and the background!! And those feathers!!
ReplyDeleteSherri, your layout is absolutely gorgeous! I love how you used negative space here! And I love the tutorial about how you made your amazing background. Thank you!!!!
ReplyDeleteLove love love love this! LOVING that colorful background you created and loving the feathers!!!!!!!!!!!!!!!!!!!!!!!
ReplyDelete